Payments
Last updated: November 13, 2025
Watch Demo Video Here
Overview
Welcome to OneCrew Payments! This tutorial provides a comprehensive walkthrough of how to enable, use, and manage online payments directly through your OneCrew invoices. By integrating payments into your invoicing workflow, you can get paid faster, reduce administrative overhead, and offer a convenient payment experience for your customers. This guide will help you master the process, from initial setup to configuring advanced options like processing fees.
Insight: Integrating payments directly into your invoicing system means less time chasing payments and more time focusing on your business. Customers appreciate the ease of paying online, leading to quicker turnaround times on your receivables.
Step-by-Step Instructions
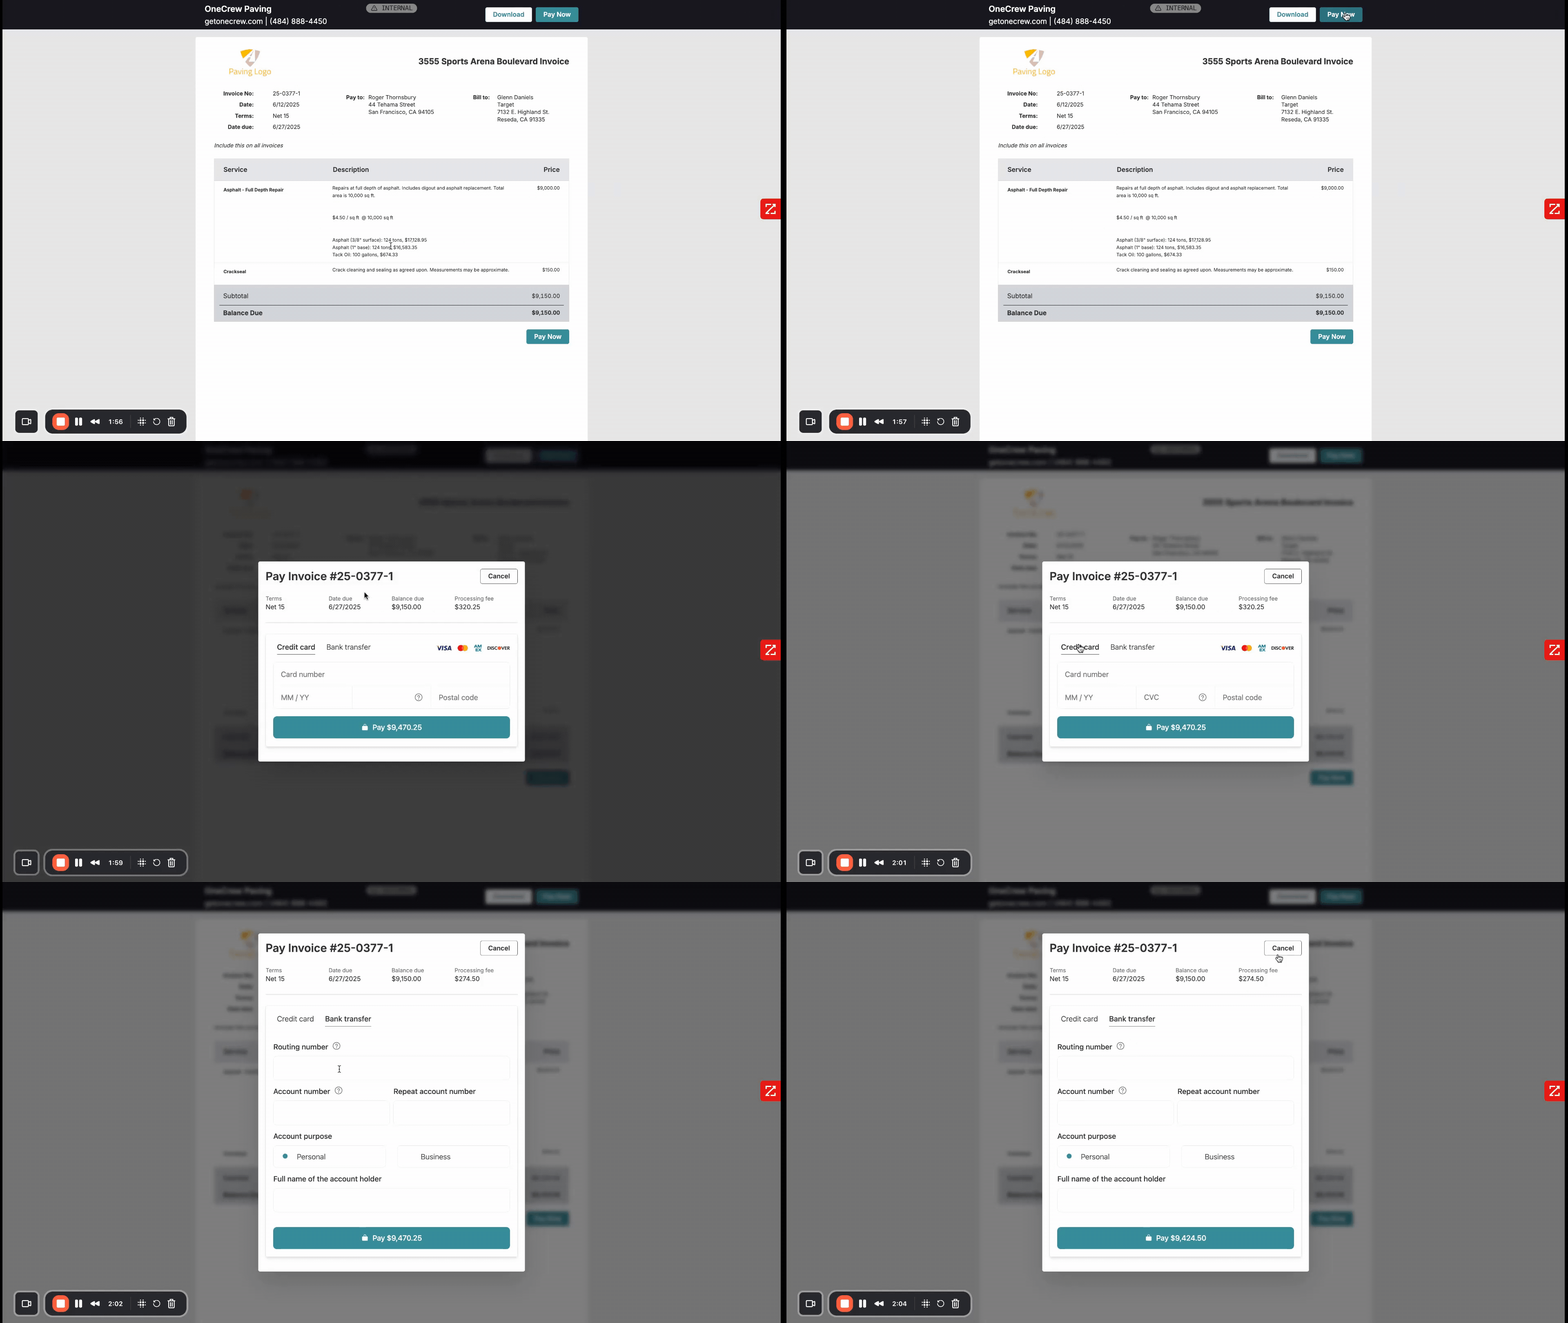
Follow these steps to set up and utilize OneCrew Payments effectively:
1. Enabling OneCrew Payments
The first step is to get payments activated on your OneCrew account.
Once enabled, you'll notice a new Payments tab appear in the left-hand navigation bar.
You will need to complete a merchant sign-up and approval process. Our team will guide you through these requirements.
2. Navigating Your Payments Dashboard
After approval, the Payments tab becomes your central hub for all transaction activity.
Click on the Payments tab in the navigation bar.
Here, you'll find three sub-tabs:
Payments: A list of all individual payment transactions.
Deposits: Information about funds deposited into your account.
Chargebacks: Any chargeback activity. This screen provides a comprehensive overview of all payments processed through OneCrew.
3. Creating an Invoice with Payment Links
OneCrew Payments is seamlessly integrated into the invoicing module.
Navigate to an existing Project or create a new one.
Go to the Invoices section within the project.
Click on + New Invoice. You can create a full invoice or a Partial Invoice (e.g., for a 20% deposit).
Fill in the invoice details and click Save.
Once saved, you can send the invoice to your customer. Options include:
Clicking Send to email the invoice.
Clicking the three-dot menu (...) for options like Copy Live URL (to share manually) or Send to Portal (if you use the Customer Portal).
4. How Customers Make Payments
Your customers will find it easy to pay their invoices.
The customer receives the digital invoice via email, a shared live URL, or through their Customer Portal.
On the invoice, they will see a prominent Pay Now button.
Clicking Pay Now opens a secure payment window.
Customers can choose to pay using:
Credit Card (Visa, Mastercard, AMEX, Discover are typically supported)
Bank Transfer (ACH)
They enter their payment details and confirm the payment.
5. Configuring Processing Fees (Optional)
You have the flexibility to manage how processing fees are handled.
Navigate to Settings in the left-hand navigation bar.
Under Settings, select Invoices.
Locate the option Enable Processing Fee on Web Payments and toggle it on if you wish to pass these fees to your customers.
You can then specify the percentage or fixed amount for Card payments (e.g., 3.5%) and ACH payments (e.g., 3%), including an ACH Max fee if applicable.
Click Save to apply your changes.
Pro Tip: Clearly communicate any passed-on processing fees to your customers in your terms of service or on the invoice itself to maintain transparency.
Troubleshooting
Here are some common issues and their solutions:
The "Payments" tab is not visible in the navigation bar.
Solution: Payments may not yet be enabled for your account. Please contact
support@getonecrew.comor your OneCrew representative to activate the feature and complete the merchant setup.
Customers report they cannot see a "Pay Now" button on the invoice.
Solution: Ensure that the invoice was generated after your OneCrew Payments setup was fully approved and completed. Double-check that you are sharing the correct live URL of the invoice or that the Customer Portal is correctly configured.
I'm having trouble with the merchant approval process.
Solution: The merchant approval process can sometimes require specific documentation. Please reach out to our support team for direct assistance and clarification on any requirements.
How are processing fees determined?
Solution: Default processing fees are set by our payment processor. You can configure whether to absorb these fees or pass them on to your customers in Settings > Invoices, as detailed in Step 5.