How to Set up and Use Taxes in Estimates
Last updated: March 26, 2026
View Video Overview Here
Overview
This tutorial provides a comprehensive walkthrough of enabling, applying, and managing taxes within your OneCrew estimates. Properly configuring taxes ensures accurate pricing on your proposals and invoices, helping you maintain financial clarity and compliance. We'll cover everything from global tax settings to applying taxes granularly on individual estimates.
Step-by-Step Guide:
Enabling Taxes Account Wide
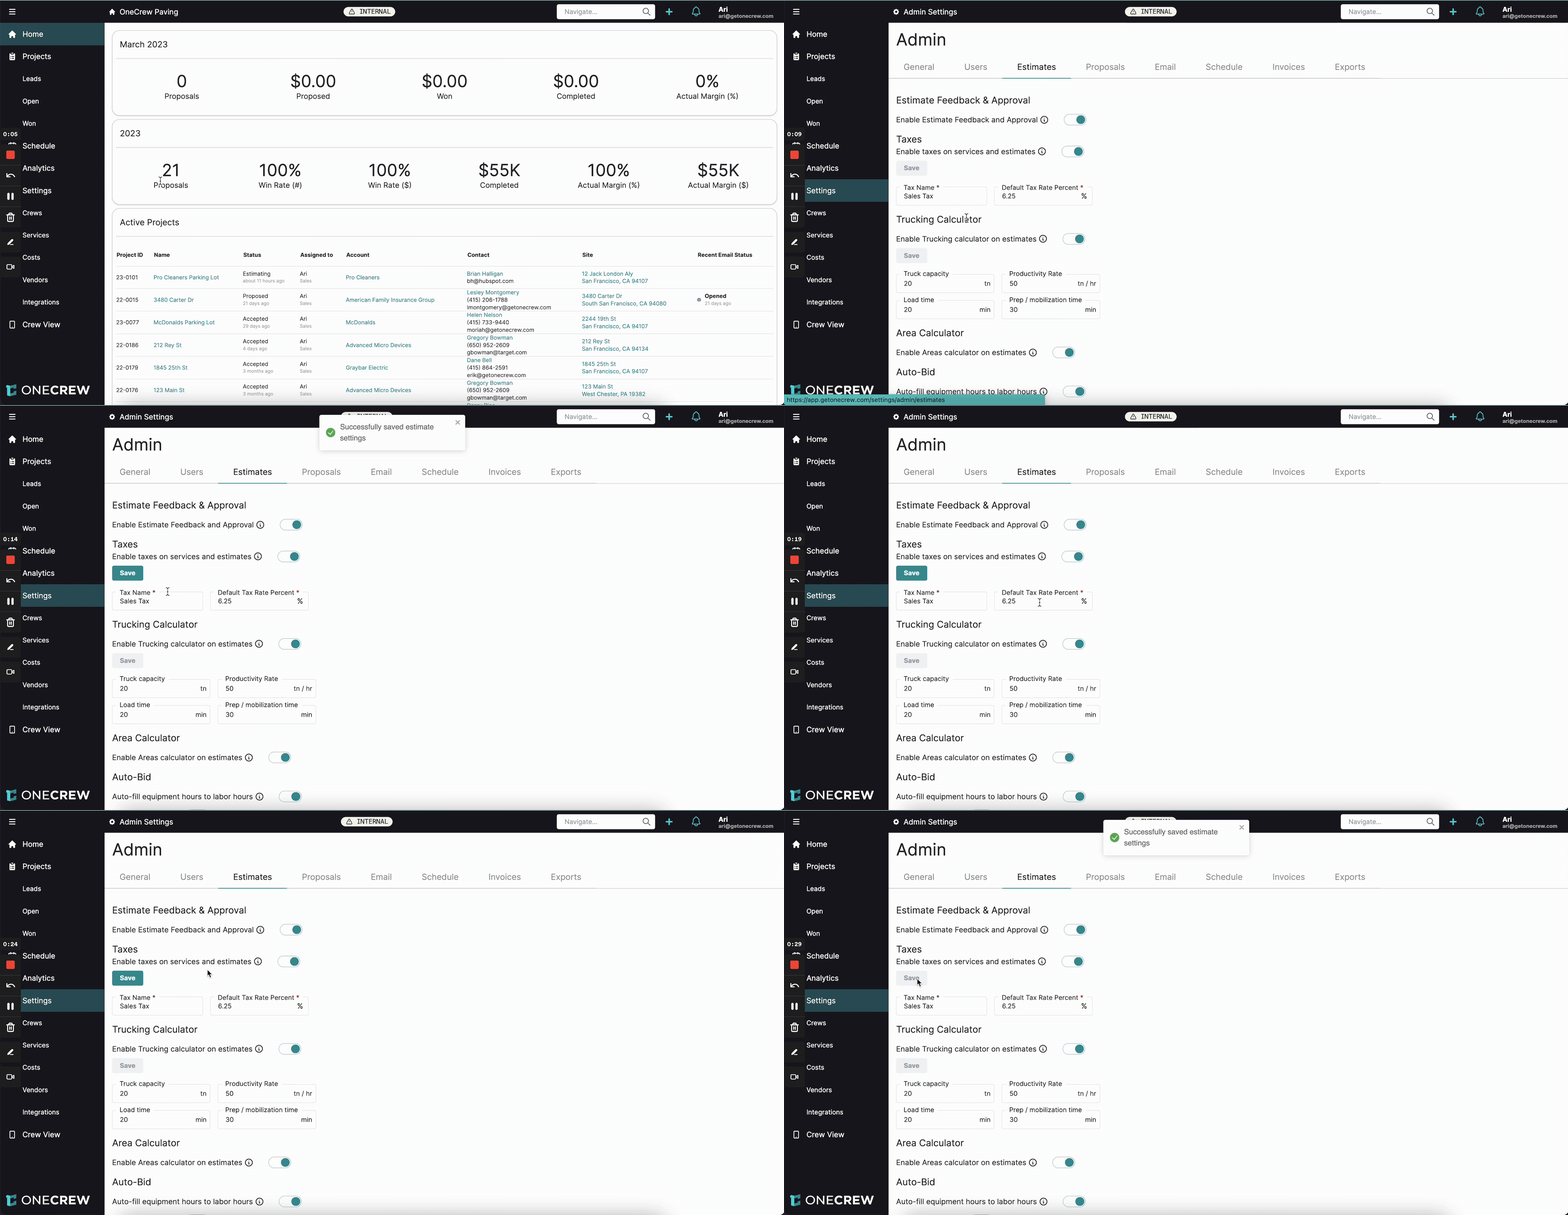
First, you need to enable the tax feature for your OneCrew account.
Navigate to Settings from the main menu on the left.
Within the Admin settings, select the Estimates tab.
Locate the Taxes section.
Toggle the switch for Enable taxes on services and estimates to the "on" position (it will turn green).
Enter a default Tax Name (e.g., "Sales Tax") and a Default Tax Rate Percent (e.g., "6.25"). This will be the standard tax applied unless overridden on a specific estimate.
Click Save. A confirmation message "Successfully saved estimate settings" will appear.
Insight: While you set a global default tax rate, OneCrew offers the flexibility to adjust this rate and the tax name on a per-estimate basis, catering to varying local tax requirements.
Adding and Customizing Taxes Within an Estimate
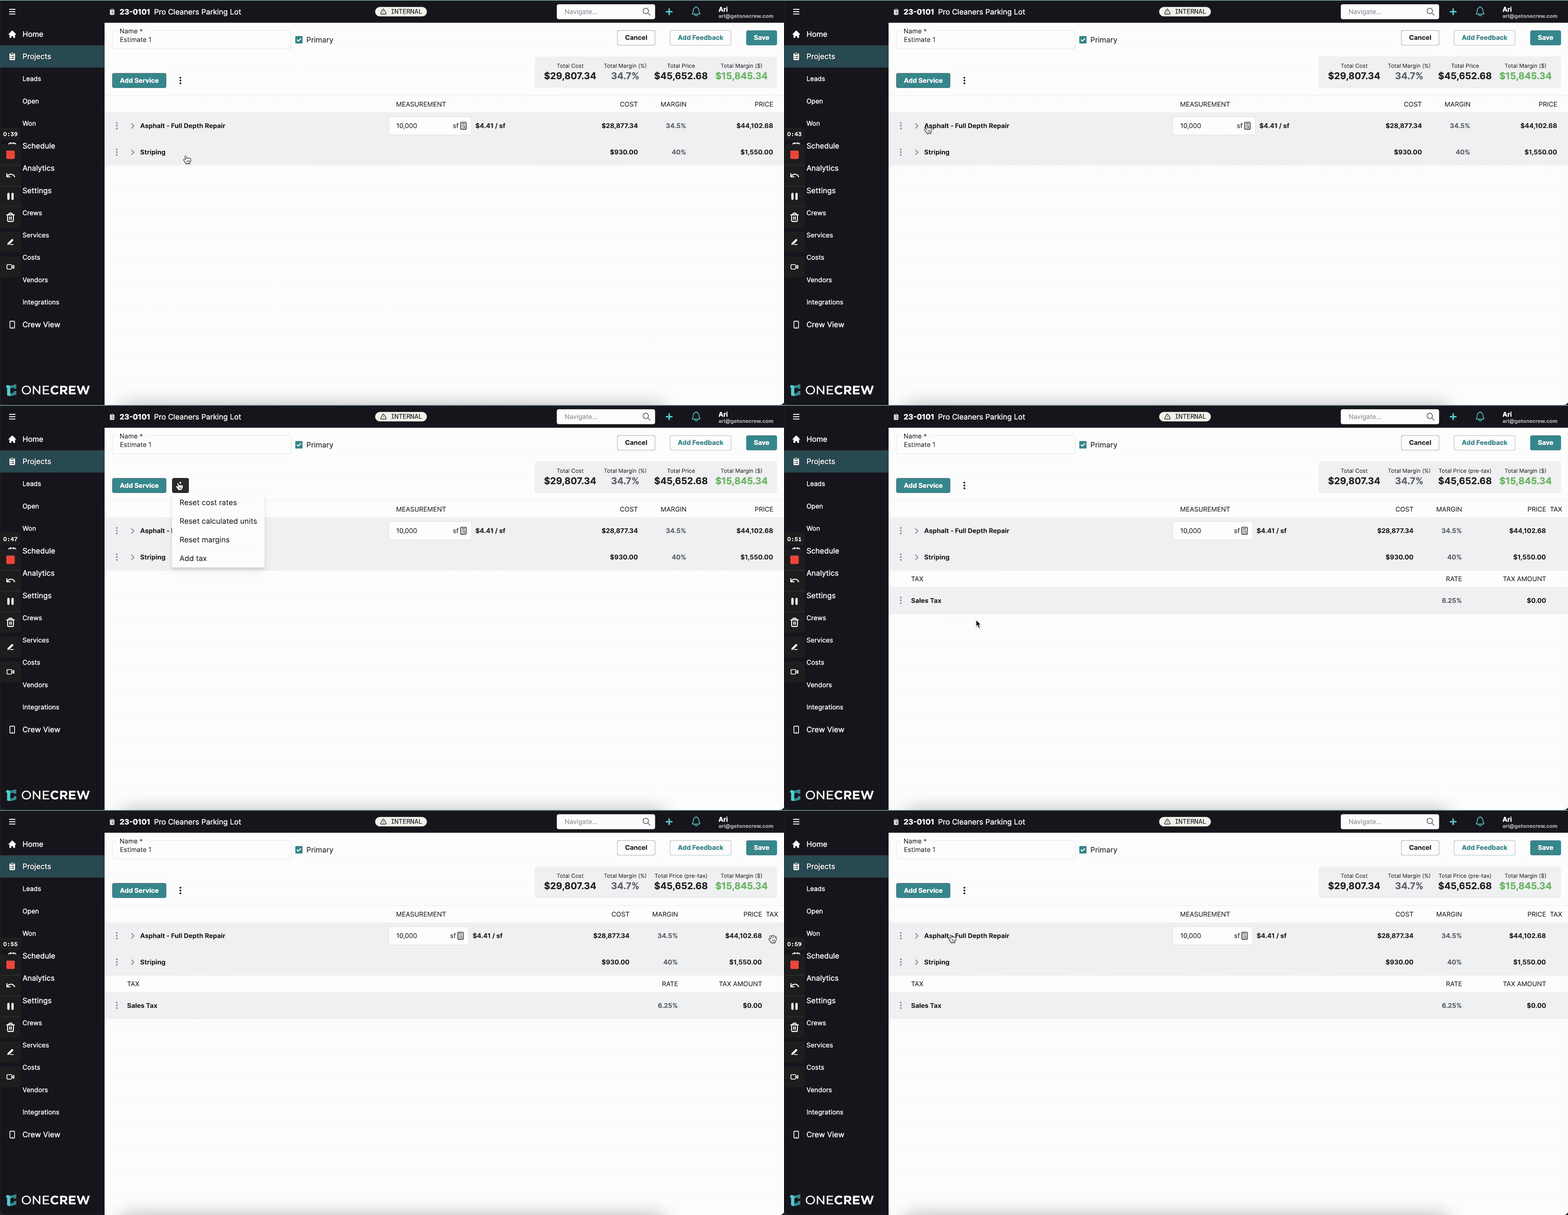
Once taxes are enabled globally, you can add them to new or existing estimates.
Navigate to Projects and open an existing project, or create a new one.
Go to the Estimates tab within the project.
If you are editing an estimate where taxes were not previously applied, click the three-dot menu icon (ellipsis) next to the Add Service button.
Select Add tax from the dropdown menu. A new line item for your default tax (e.g., "Sales Tax") will appear at the bottom of the estimate, along with its rate and calculated amount. A new TAX column with a "T" indicator will also appear next to cost items that are taxable.
Applying Taxes to Specific Services or Line Items
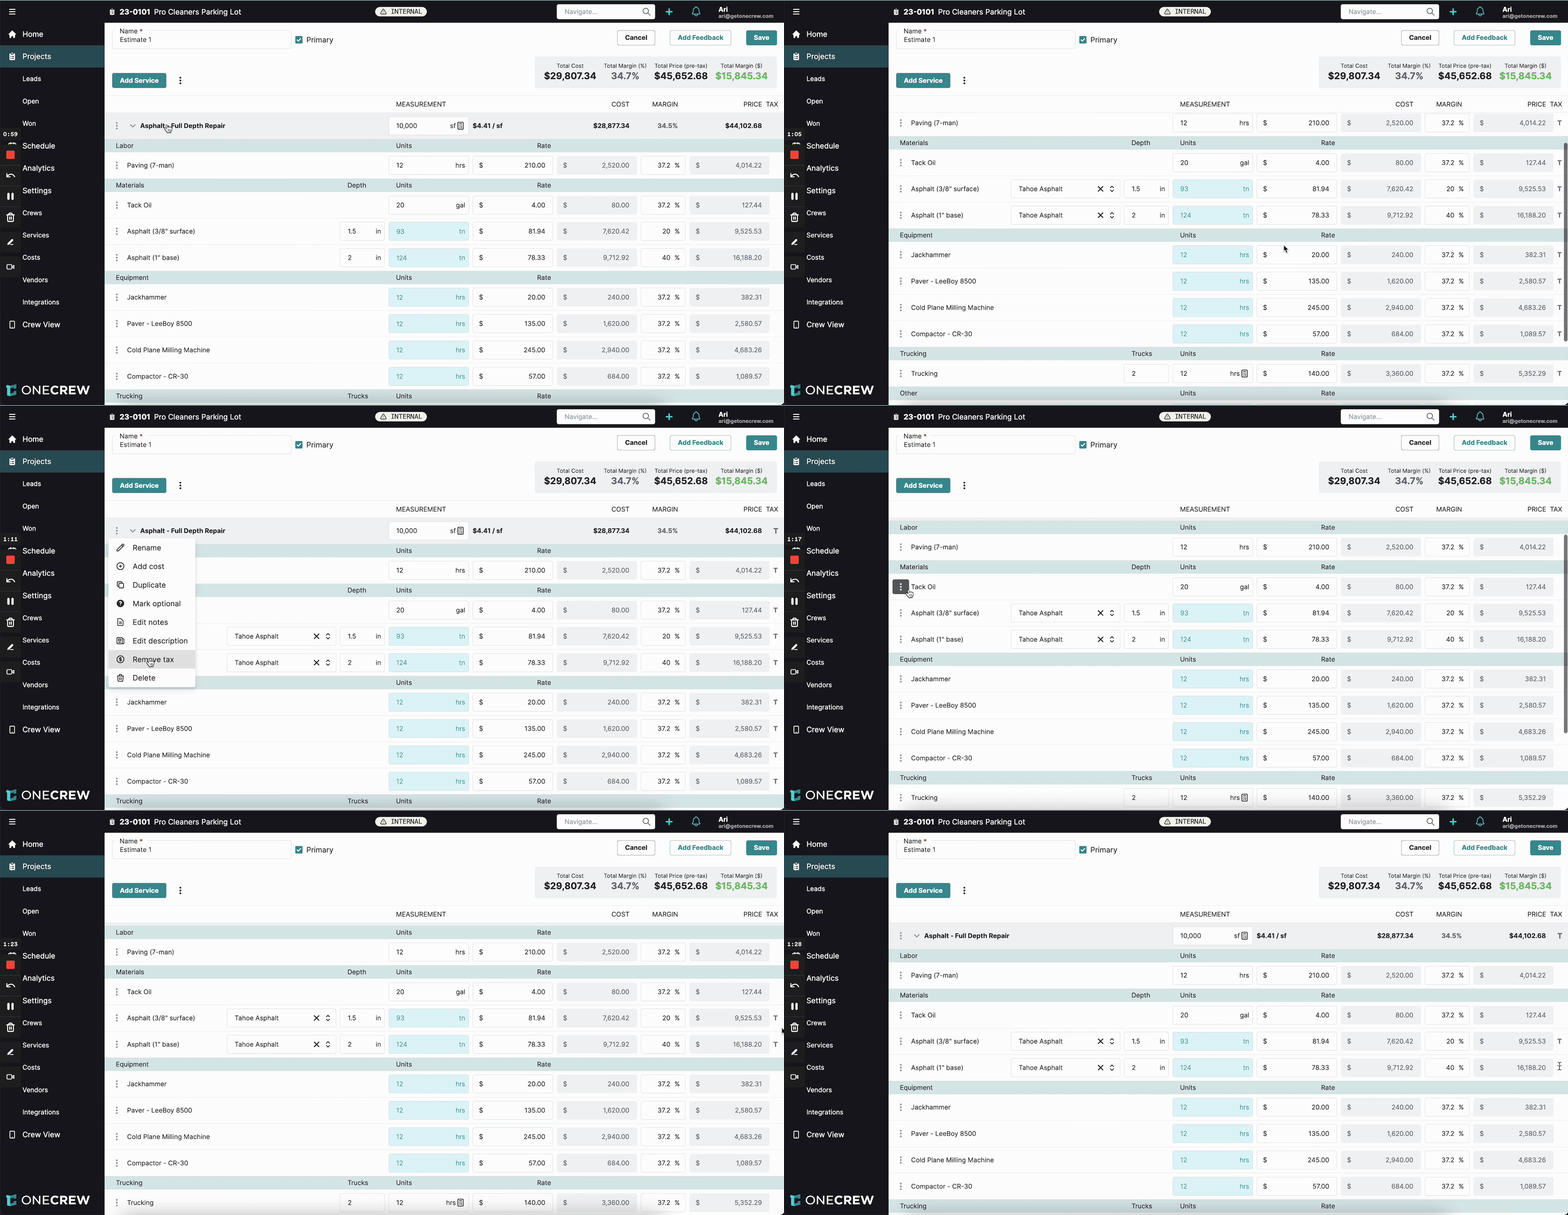
You have granular control over which services and individual cost items are taxed.
To apply tax to all items within a specific service:
Expand the service line (e.g., "Asphalt - Full Depth Repair") by clicking the arrow next to its name.
Click the three-dot menu icon to the left of the service name.
Select Add tax. A "T" will appear in the TAX column for all cost items within that service.
To apply tax to an individual cost item (e.g., a specific material or labor item):
Ensure the service containing the item is expanded.
Click the three-dot menu icon to the left of the specific cost item.
Select Add tax. A "T" will appear in the TAX column for that item.
To remove tax, follow the same steps and select Remove tax.
Modifying Tax Rate and Name on an Estimate
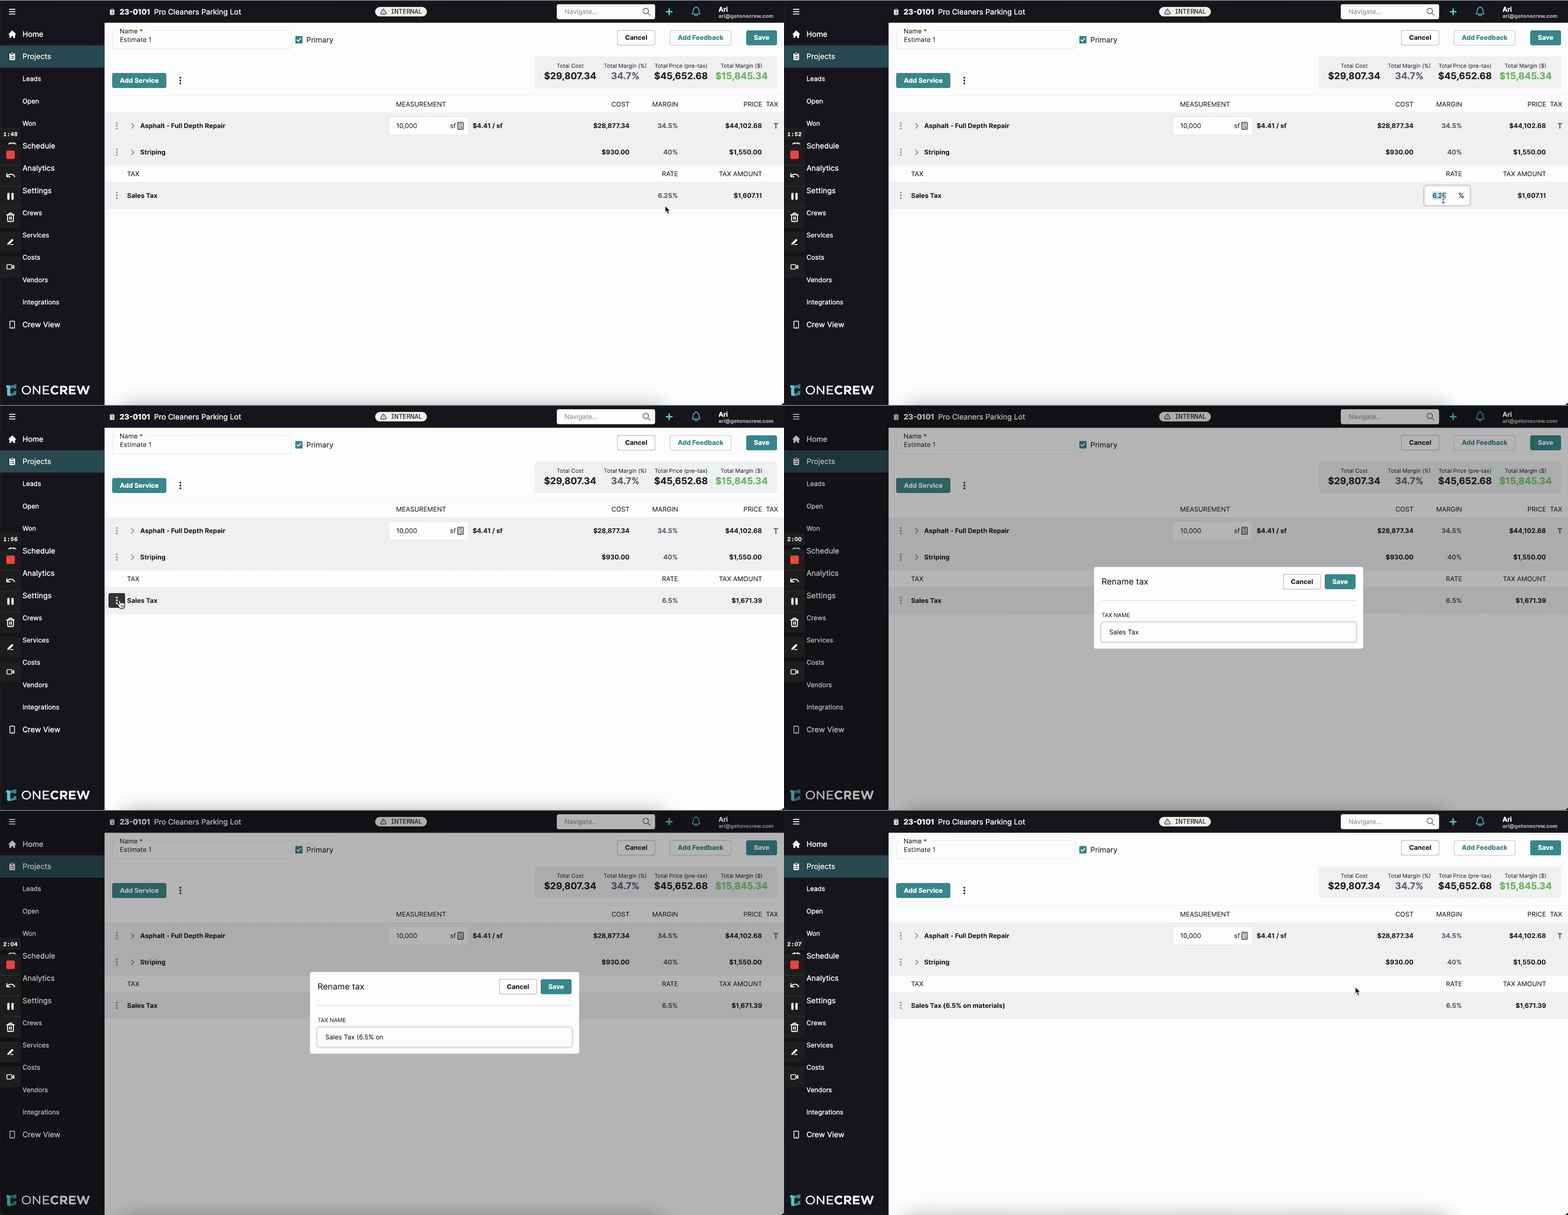
You can customize the tax rate and name for each estimate.
To change the tax rate for the current estimate:
Locate the tax line item at the bottom of your estimate (e.g., "Sales Tax").
Click directly on the percentage value in the RATE column (e.g., "6.25%").
Enter the new rate (e.g., "6.5") and click outside the field. The tax amount will recalculate.
To rename the tax for the current estimate:
Click the three-dot menu icon to the left of the tax name (e.g., "Sales Tax").
Select Rename tax.
In the Rename tax pop-up, enter the new TAX NAME (e.g., "Sales Tax (6.5% on materials)").
Click Save.
This customized tax name and rate will appear on proposals and invoices generated from this estimate. For instance, the proposal will show the subtotal, the specific tax line (e.g., "Sales Tax (6.5% on materials)") with its amount, and then the final total.
Setting Defaults: Taxable Costs in Service Templates
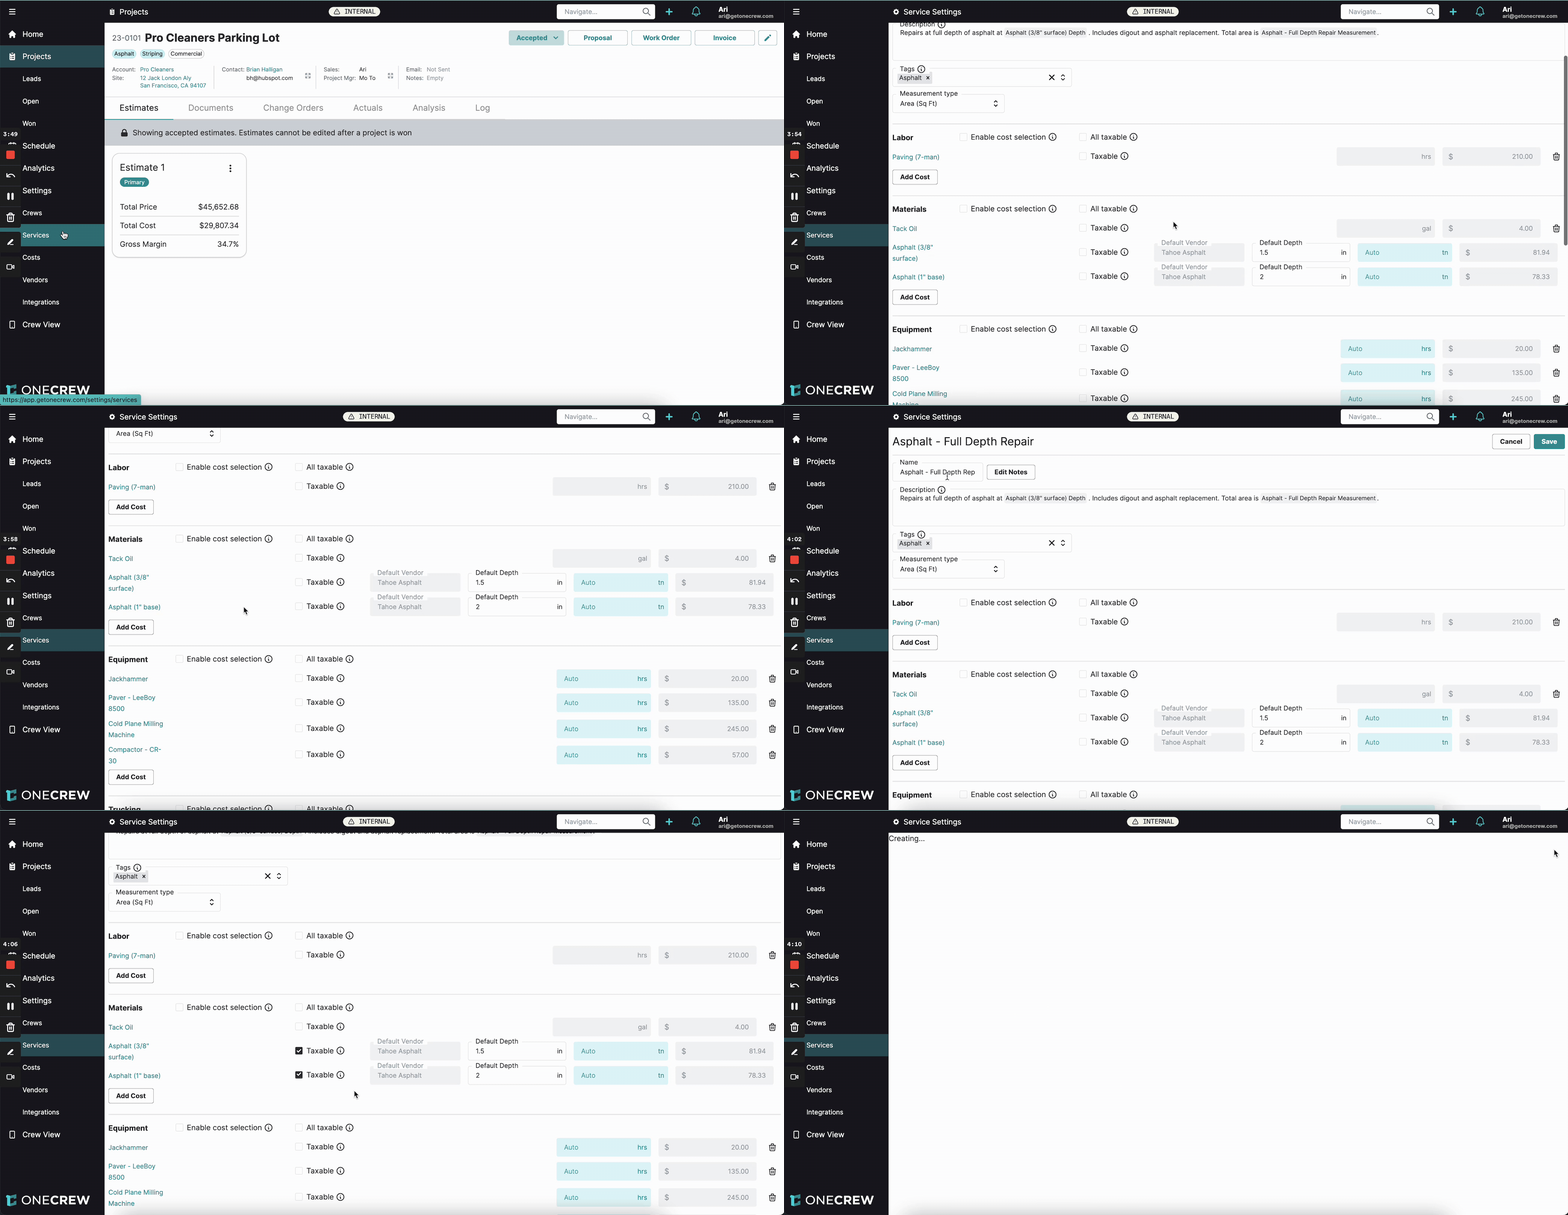
To save time, you can pre-configure which cost items within a service are typically taxable.
Navigate to Services from the main menu.
Click on the service you wish to edit (e.g., "Asphalt - Full Depth Repair").
For each cost item (Labor, Materials, Equipment, etc.) that should be taxable by default, check the Taxable checkbox next to it.
Click Save at the top right of the service settings page.
Pro Tip: Now, whenever you add this service to an estimate and then add taxes to that estimate, these pre-selected items will automatically be marked as taxable.
Troubleshooting
Tax not appearing on estimate:
Ensure taxes are enabled globally under Settings > Estimates.
Verify you've clicked Add tax from the three-dot menu on the specific estimate.
Tax calculated incorrectly:
Check if the correct items are marked with a "T" in the TAX column. Tax is only applied to these items.
Confirm the tax rate on the estimate is set to the desired percentage.
Tax name is generic:
Rename the tax on the estimate itself for more specific labeling on proposals and invoices, as shown in the "Modifying Tax Rate and Name" section.