Adding Measurement Column to Service Table
Last updated: August 7, 2025
Watch Video Demo Here
Overview
This tutorial will guide you through adding a dedicated measurement column (e.g., square footage, linear feet, quantity) to the services table within your proposals. Displaying measurements directly in the services grid provides clients with a clearer, more detailed breakdown of the work quoted, enhancing transparency and professionalism in your estimates.
Insight: Making measurements a clear part of your proposal helps clients quickly understand the scope and scale of each service, reducing potential confusion.
Step-by-Step Guide
Adding the Measurement Column to a Specific Proposal
If you need to display measurements for services on an individual proposal, follow these steps:
Navigate to the Projects section and select the project containing the proposal you wish to edit. Open the Proposal document.
To modify the proposal layout, click the three-dot menu icon located in the top-right corner of the proposal view, then select the option to Edit the document (or an Edit button may be directly visible, which you would click). This action will enable editing mode for the proposal content.
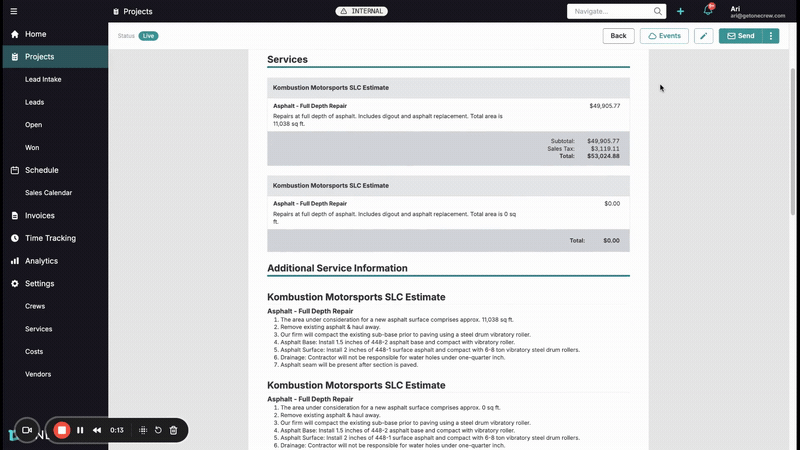
Within the proposal editor, locate the Services Description (or similarly named) section that lists the services. Click the Options button (often depicted as a filter or sliders icon) associated with this table.
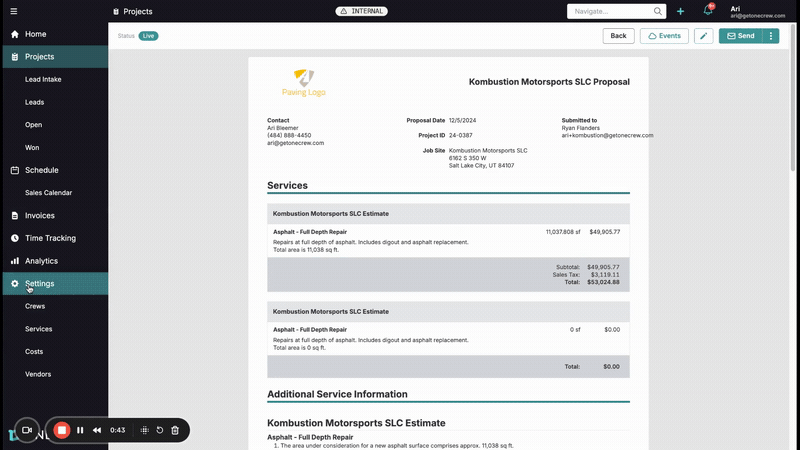
A dropdown menu will appear. Find and check the box next to Include measurement column. You should immediately see the services table adjust; a new column will appear displaying the measurement data (like "11,038 sq ft"), typically positioned between the service description and its price.
Pro Tip: Before sending to a client, preview the proposal to ensure the new column aligns well with your overall document layout and that all measurements are displayed as expected.
Once satisfied, click the main Save button, usually found at the top right of the proposal editor, to preserve your changes. The proposal will now include this detailed measurement column.
Setting the Measurement Column as a Default for All Proposals
To ensure all future proposals automatically include the measurement column, you can configure this as a default setting.
From the main application menu (usually on the left side), click on Settings.
In the Settings area, find and select Proposals from the list of administrative options.
Scroll towards the bottom of the Proposals settings page. Look for a section titled Default Service Grid Measurement Column.
Activate the Include measurement column option by toggling the switch next to it to the "on" position. The system should confirm that the "Proposal settings updated" or a similar message will appear.
This change establishes the default behavior for newly created proposals. Existing proposals will not be affected and will need to be updated individually if desired using the method described in the previous section.
Troubleshooting
Measurement column is enabled, but no values appear for some services: This usually means that the specific services lack measurement data (e.g., square footage, quantity) in their original estimate or line item setup. Verify the service details in the project's estimate section.
Layout looks crowded after adding the column: If the table becomes too wide, consider slightly rephrasing service descriptions or adjusting other column visibility options (if available through the same Options menu) to improve readability.
Option to 'Include measurement column' is missing: Ensure your application is updated to the latest version, as features can vary between releases. If the problem continues, it might be a permission issue or a configuration specific to your account; consulting your system administrator or support would be the next step.