Partial Invoices
Last updated: August 7, 2025
Watch Video Demo Here
Overview
This tutorial will guide you through creating partial invoices for your projects. Partial invoicing is incredibly useful for managing cash flow, allowing you to bill for a deposit upfront or invoice for completed stages of a larger project. This structured approach helps you maintain financial clarity and ensures you're compensated as work progresses.
Step-by-Step Instructions
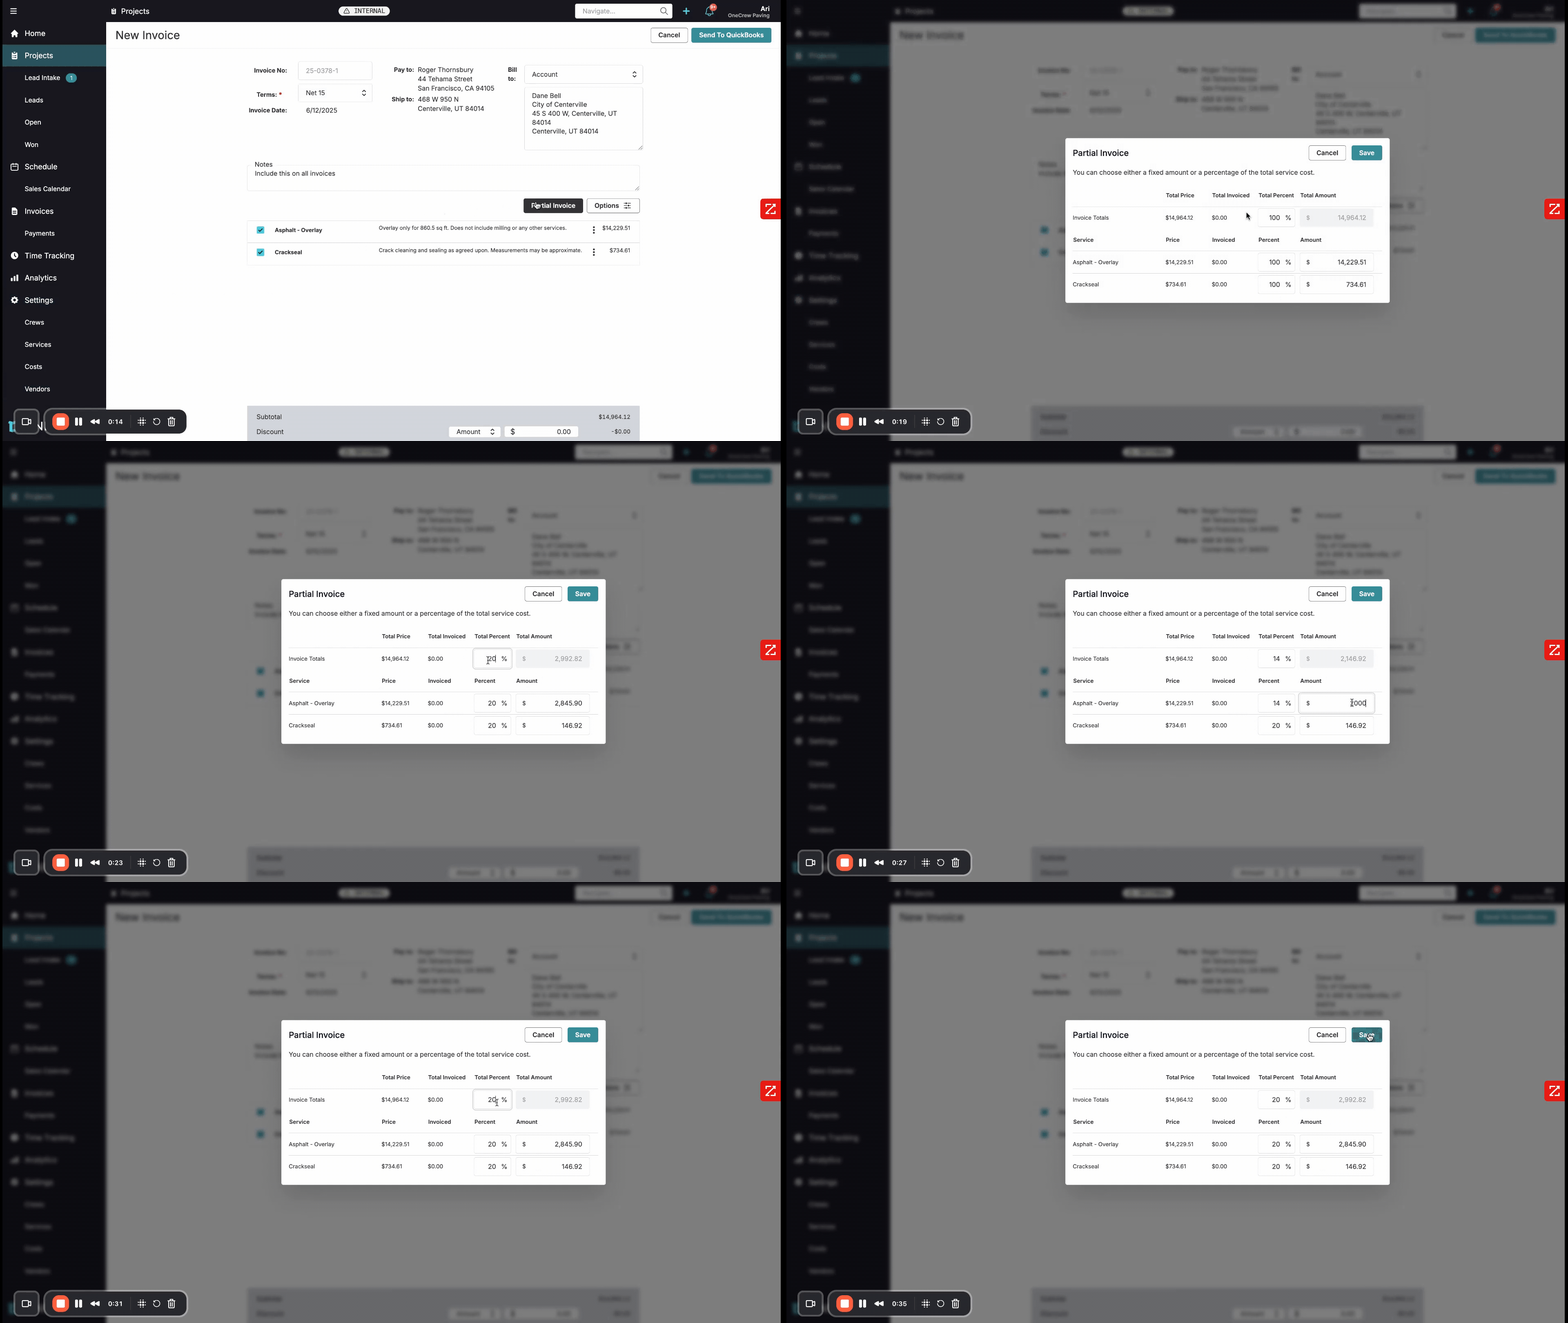
Follow these steps to create a partial invoice for an accepted project:
Navigate to Project Invoices:
Open the accepted project for which you want to create an invoice.
Click on the Invoices tab located in the upper right section of the project page. This will take you to the invoicing screen for that specific project.
Create a New Invoice:
If no invoices exist, you'll see a message "No invoices have been created for this project."
Click the + New Invoice button. This will open the new invoice creation screen, pre-filled with project details and line items from your estimate.
Access Partial Invoice Options:
On the New Invoice screen, locate the Partial Invoice button, typically found above the line items.
Click the Partial Invoice button. A pop-up window titled "Partial Invoice" will appear.
Insight: The Partial Invoice feature allows for flexible billing. You can invoice for a percentage of the total project, a fixed amount, or even different percentages/amounts for individual service line items.
Define the Partial Amount:
In the "Partial Invoice" pop-up, you'll see your project's services listed with their full prices.
You can adjust the invoice amount at the Invoice Totals level or for each Service line item individually.
To set a percentage for the entire invoice (e.g., a 20% deposit), enter the desired percentage in the Total Percent field under Invoice Totals. The corresponding Total Amount will update automatically.
Alternatively, you can enter a specific dollar Amount for a service or for the total, and the system will calculate the percentage.
For this example, let's set a 20% deposit. Enter
20in the Total Percent field for Invoice Totals.Click Save. The line items on the main invoice page will now reflect the partial amounts.
Finalize and Send the Invoice:
Review the updated invoice details. The subtotal and balance due will reflect the partial amount you've set.
Click Send To QuickBooks (or your integrated accounting software) if applicable. You may need to link the customer if this is the first invoice for them.
The invoice is now created for the partial amount.
Creating Subsequent Invoices:
When you're ready to bill for the remaining amount (or another portion), navigate back to the project's Invoices tab and click + New Invoice again.
Click the Partial Invoice button.
The system automatically calculates the remaining balance. For instance, if you previously invoiced 20%, it will default to invoicing the remaining 80%. The "Total Invoiced" column will show the amount already billed.
Click Save and proceed to finalize and send this subsequent invoice. This ensures you don't accidentally over-invoice the client.
Pro Tip: Clearly communicate your partial invoicing schedule with your clients. This transparency helps manage expectations and ensures smoother payment collection.
Troubleshooting
"Partial Invoice" button is missing: This feature might need to be enabled in your system settings. Check your account or company settings under the invoicing section, or contact your administrator.
Incorrect remaining balance on subsequent invoices: Ensure all previous partial invoices and any payments received are correctly recorded in the system. The "Total Invoiced" amount in the "Partial Invoice" pop-up should reflect what has already been billed.
Unable to send to QuickBooks: Verify your QuickBooks integration is active and correctly configured. Ensure the customer is properly mapped between systems. [add link to relevant article on QuickBooks integration]