Web Invoices
Last updated: August 7, 2025
Watch Video Demo Here
Overview
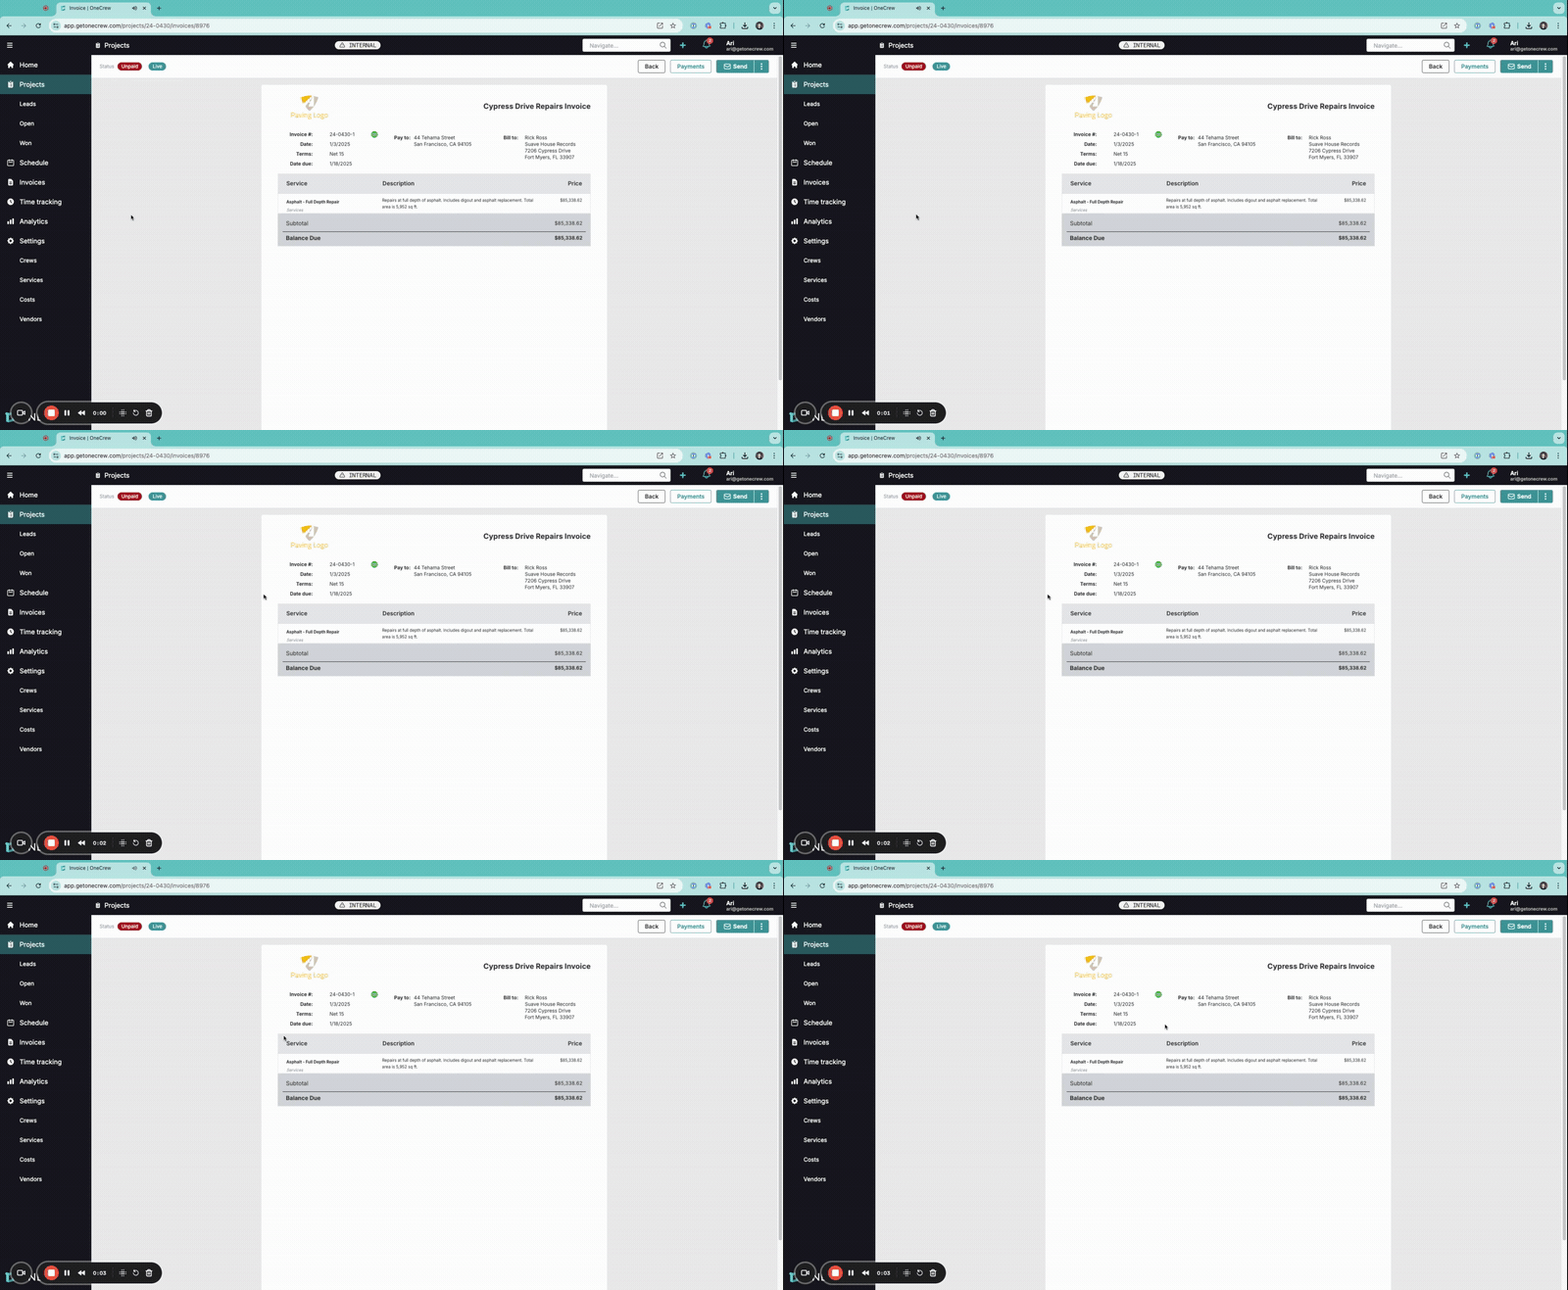
Web Invoices in OneCrew provide a streamlined, professional way to present and share invoices with your clients. Instead of static PDF attachments alone, Web Invoices offer a live, accessible online version of an invoice. This feature enhances client communication by providing a dedicated, easy-to-access link where they can view all invoice details, and it integrates seamlessly with the Customer Portal for a centralized experience.
The primary purpose of Web Invoices is to offer flexibility and convenience in how clients receive and interact with their billing documents. When an invoice is made "live," it generates a unique URL that can be shared directly or embedded in emails. This means clients can view their invoice anytime, from any device with internet access, without needing to download or search for files.
Key Benefits:
Enhanced Professionalism: Present invoices in a clean, branded web format.
Improved Accessibility: Clients can easily view invoices via a direct link or through the Customer Portal.
Streamlined Communication: Reduce back-and-forth by providing a single source of truth for invoice details.
Flexible Sharing: Send invoices via email with a link, as a PDF, or directly to the Customer Portal.
Centralized Access (via Portal): Clients can see all their project-related invoices in one place if using the Customer Portal.
Insight: Web Invoices transform static billing documents into dynamic, easily accessible resources for your clients, enhancing transparency and potentially speeding up payment cycles.
Configuration
Configuring and managing Web Invoices involves understanding how to access them, make them live, and utilize the various sharing options.
Accessing and Viewing Invoices: You can view an invoice, which forms the basis of the Web Invoice, in a couple of ways:
Navigate to the main Invoices section from the left-hand sidebar. Here, you'll see a list of all invoices. Clicking on an invoice number will open its preview.
Go to a specific Project. Within the project, click on the Invoices tab. This will list all invoices related to that project. Click an invoice number to view it.
Once an invoice is open, you'll see its details. The status might show as Unpaid. If a Live URL has been generated and copied for this invoice, a Live badge will also appear.
Making an Invoice "Live": An invoice becomes a "Web Invoice" (i.e., accessible via a URL) when you generate its live link:
Open the desired invoice.
Click the Send button (which often looks like a paper airplane icon or may be a three-dots menu for more options).
From the dropdown menu, select Copy Live URL. This action copies the unique web address for that invoice to your clipboard and activates its "Live" status. You can now share this URL.
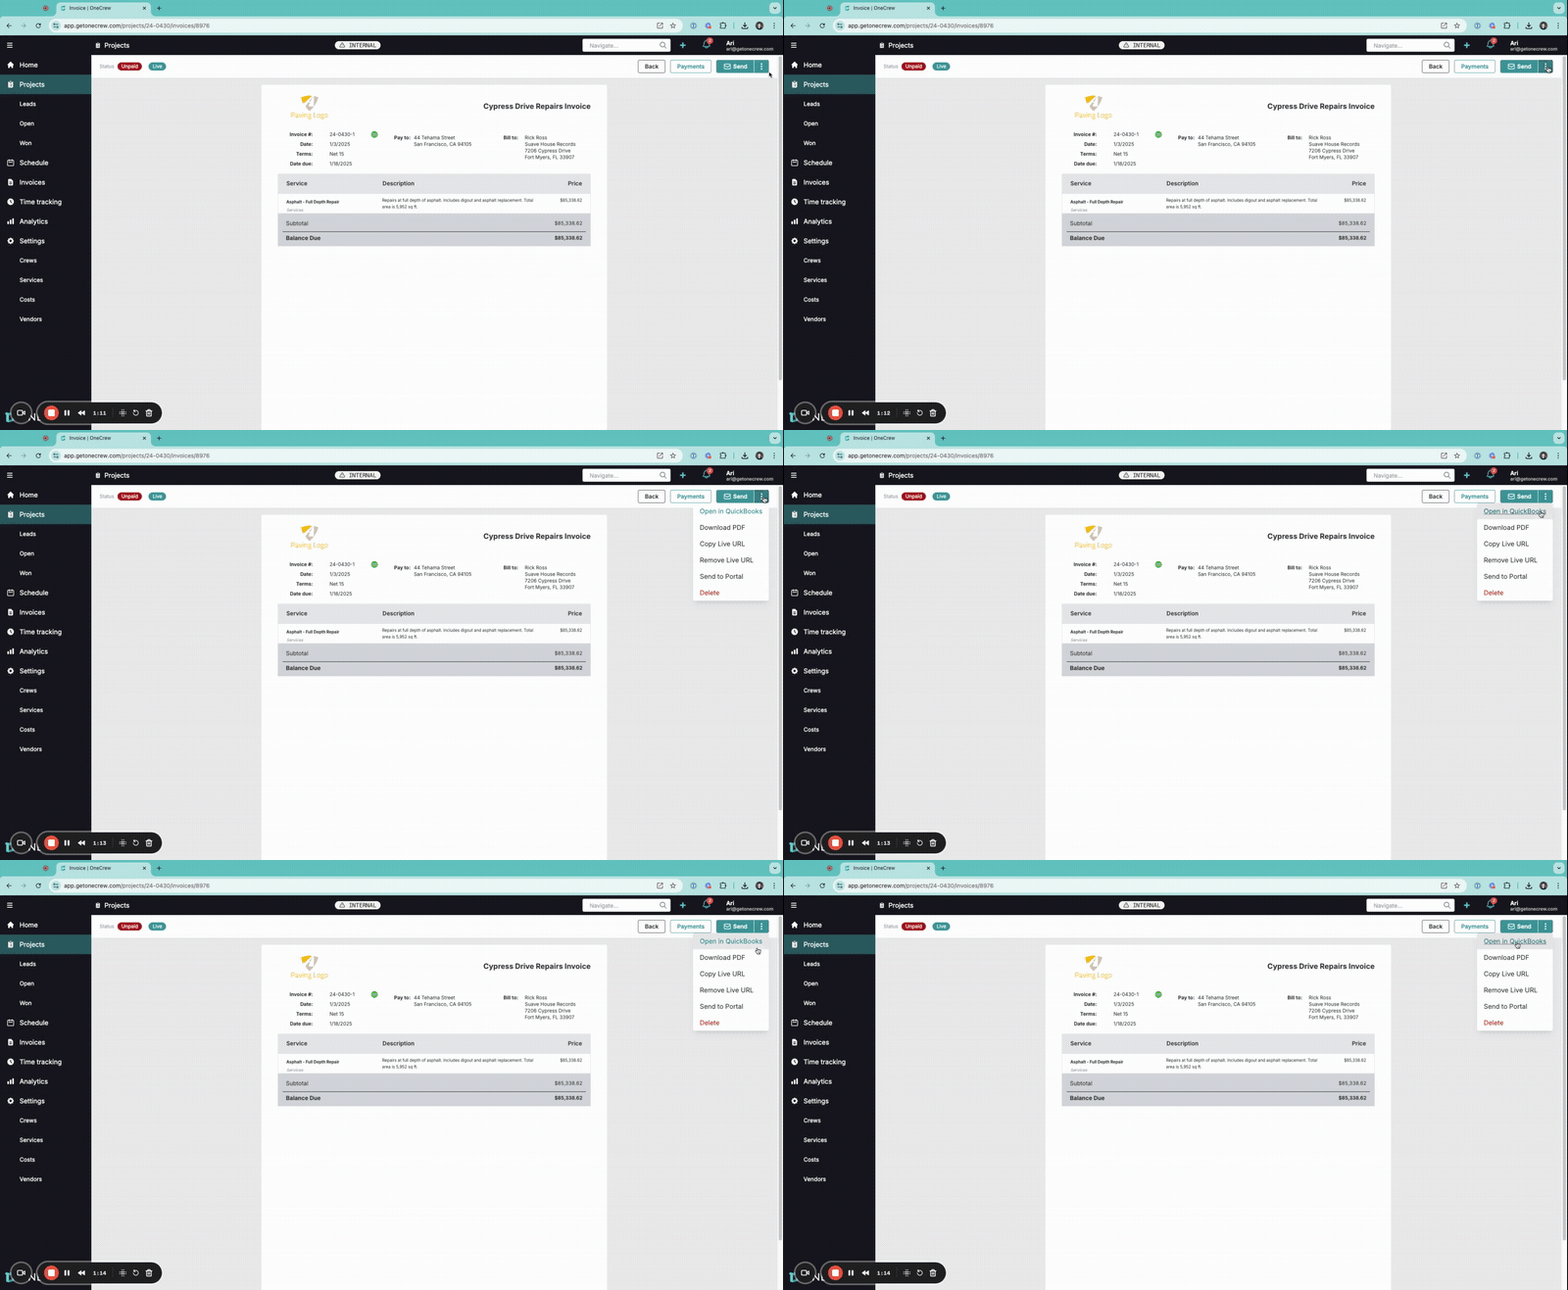
Sharing and Management Options: The Send button (or the three-dots menu next to it) provides several options:
Send via Email:
Clicking Send (if it directly opens the email modal) or selecting an email option from the menu.
A dialog appears where you can specify To, Cc, Bcc, Reply To, Display Name, and Subject Line.
You can choose to Include Invoice as a PDF attachment or ensure the body of the email contains the link to the Web Invoice.
Utilize pre-configured Templates for consistent messaging. Learn more about Email Templates [add link to relevant article].
Open in QuickBooks: If the invoice is synced with QuickBooks (often indicated by a green checkmark icon next to the invoice number), this option will take you directly to the invoice in your QuickBooks account.
Download PDF: Allows you to download a PDF version of the invoice.
Copy Live URL: As described above, generates and copies the link to the Web Invoice.
Remove Live URL: If you want to revoke access to a Web Invoice that was previously shared via a live link, select this option. This effectively "takes down" the live web page for that invoice.
Send to Portal: Shares the invoice directly to the Customer Portal for the associated project. The client will see it in their portal interface. Learn more about the Customer Portal [add link to relevant article].
Delete: Removes the invoice (use with caution).
QuickBooks Integration Considerations:
If an invoice is integrated and synced with QuickBooks, it generally cannot be edited directly within OneCrew once sent to QuickBooks.
Any necessary edits to such invoices must be made in QuickBooks.
Invoices created and managed solely within OneCrew (not synced to QuickBooks) can typically be edited directly in the platform, similar to how proposals are edited.
Insight: The "Live URL" is the cornerstone of the Web Invoice feature. Generating it makes your invoice web-accessible, and removing it gives you control over that access.
Use Cases
Understanding when and why to use Web Invoices can significantly improve your billing workflow and client interactions.
When to use Web Invoices:
Digital-First Clients: For clients who prefer online access over traditional attachments.
Easy Reference: When you want to provide a persistent link that clients can bookmark or refer back to easily.
Customer Portal Integration: If you utilize the Customer Portal, sharing invoices there creates a cohesive experience.
Quick Sharing Needs: When you need to quickly send an invoice link without composing a full email.
Tracking Invoice Views (Implicitly): While not a direct tracking feature, sharing a live link means the client is accessing the most up-to-date version.
Why use Web Invoices:
Improved Client Experience: Offers a modern, convenient way for clients to manage their invoices from you.
Reduced Administrative Overhead: Simplifies the process of sending and resending invoices.
Versatility in Delivery: Caters to different client preferences, whether they prefer an email link, a PDF, or portal access.
Consistency: Especially with the Customer Portal, it provides a consistent place for all project-related financial documents.
Pro Tip: For recurring clients, consistently using the Customer Portal to share Web Invoices creates a predictable and organized experience, reducing the need for them to ask for past invoices.
Examples
Here are a few real-world scenarios demonstrating how Web Invoices can be used:
Example 1: Emailing an Invoice with a Live Link and PDF
A client prefers to receive invoices via email and likes having both a direct link and a PDF for their records.
Navigate to the specific invoice you want to send from the Projects > [Project Name] > Invoices tab or the main Invoices list.
Click the Send button (paper airplane icon) or the three-dots menu and choose the email option.
In the Send Invoice dialog:
Enter the client's email in the To field.
Ensure the Subject Line is clear (e.g., "Invoice [Invoice Number] for Project [Project Name]").
Check the Include Invoice box to attach the PDF.
In the Message body, you can include a line like, "You can also view your invoice online here: [Paste the Live URL if not automatically included, or confirm a button/link is present]." To get the Live URL, you might first use the Copy Live URL option from the three-dots menu.
Alternatively, some email templates might automatically include a "View Invoice Online" button that uses the Live URL.
Click Send Email.
Result: The client receives an email with the PDF attached and a link to the live Web Invoice.
Example 2: Sharing an Invoice via the Customer Portal
You want to provide a client with a centralized place to see all their project documents, including invoices.
Open the invoice you wish to share.
Click the three-dots menu next to the Send button.
Select Send to Portal.
A Send to Portal dialog will appear. You can add an optional message, such as "Here is your latest invoice for the Cypress Drive Repairs project."
Click Send.
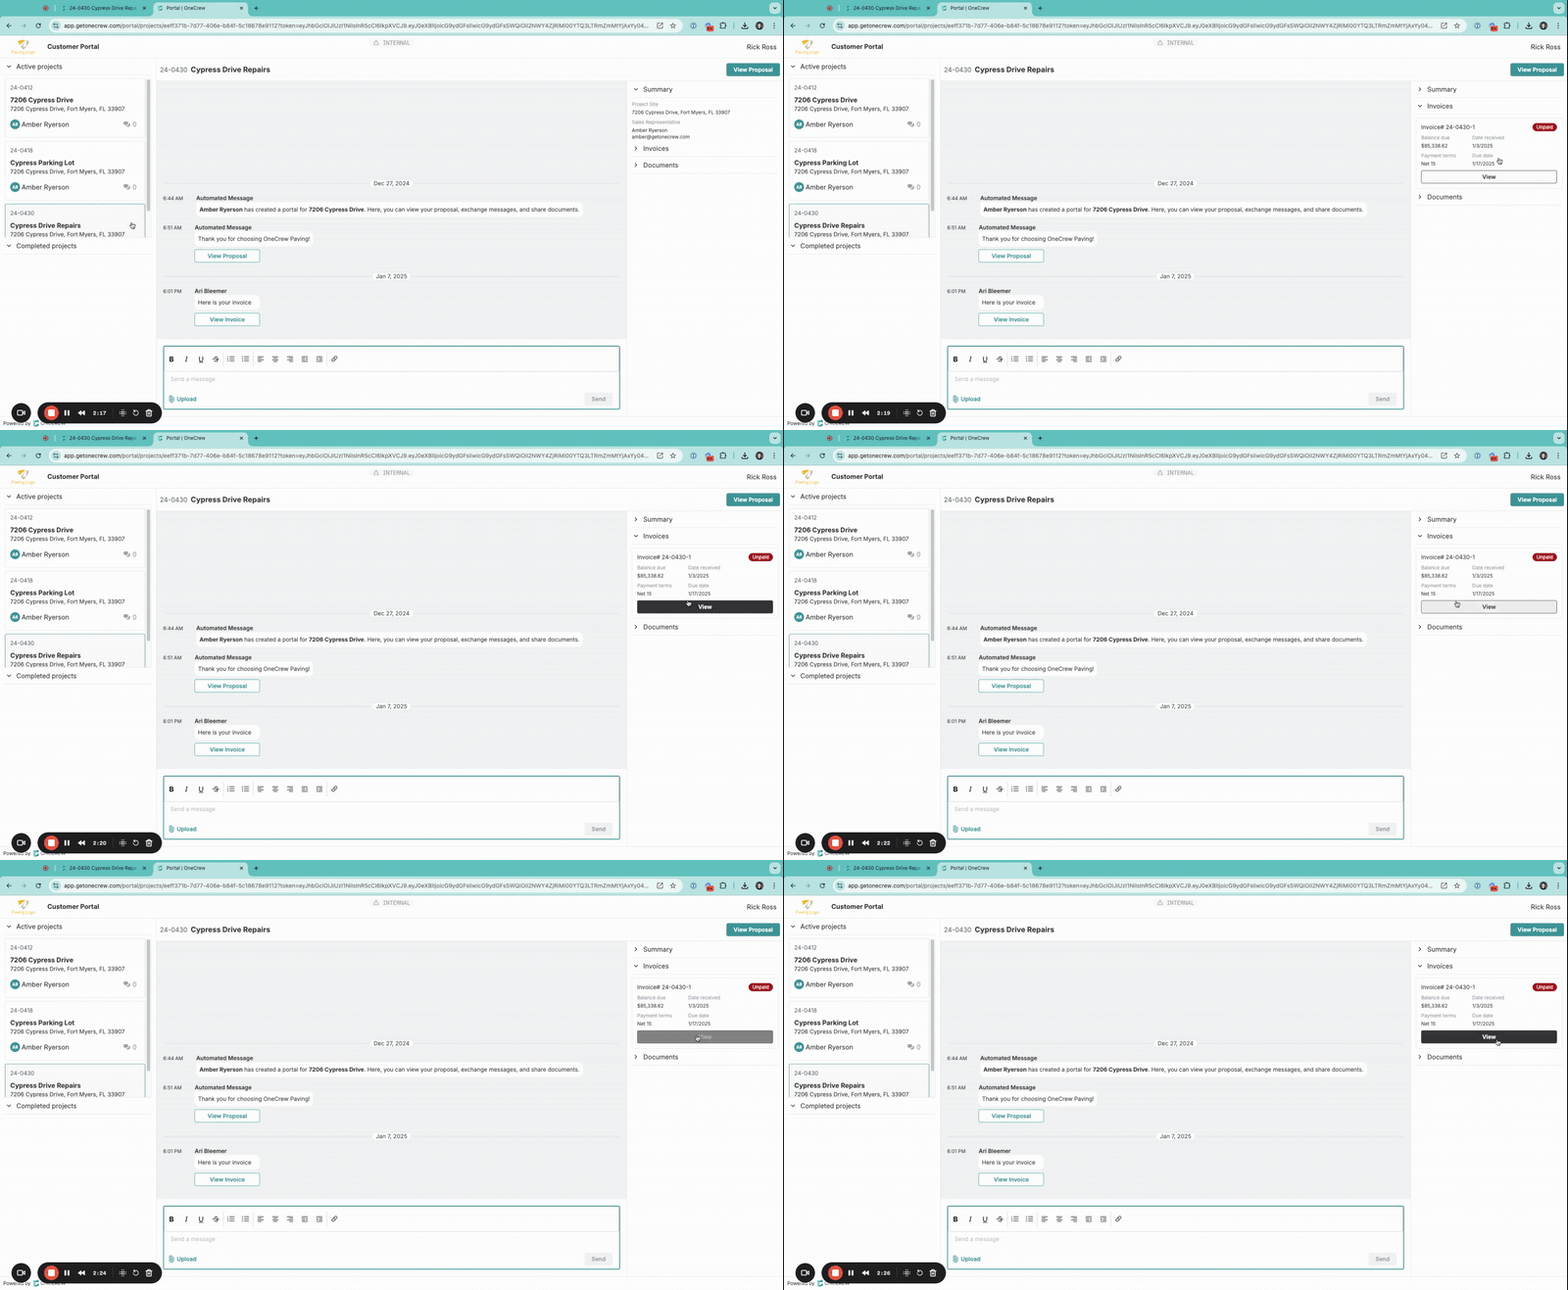
Result: The invoice will now appear in the client's Customer Portal under the specific project. They'll see it listed in an Invoices section (often on the right sidebar of the portal when viewing that project), showing the invoice number, balance due, date, terms, due date, and status (e.g., Unpaid). They can click a View button to open the full Web Invoice.
Example 3: Making an Invoice Temporarily Unavailable
You've shared a Web Invoice via a live URL, but an error was found, and you need to make corrections before the client views it or makes a payment.
Navigate to the invoice in OneCrew.
Click the three-dots menu.
Select Remove Live URL.
Confirm the action if prompted.
Result: The previously shared live link will no longer display the invoice. The page will typically show an error or indicate it's no longer available. The Live badge on the invoice within OneCrew will disappear.
After making corrections (e.g., editing in QuickBooks if synced, or directly in OneCrew if not), you can re-generate and re-share the Live URL.
Pro Tip: Before sending a Web Invoice link to a client, especially for the first time or after making changes, use the Copy Live URL feature and open the link in an incognito browser window. This allows you to see exactly what your client will see and catch any potential issues.