Proposal Ordering and Cover Page
Last updated: August 7, 2025
Watch Video Demo Here
Overview
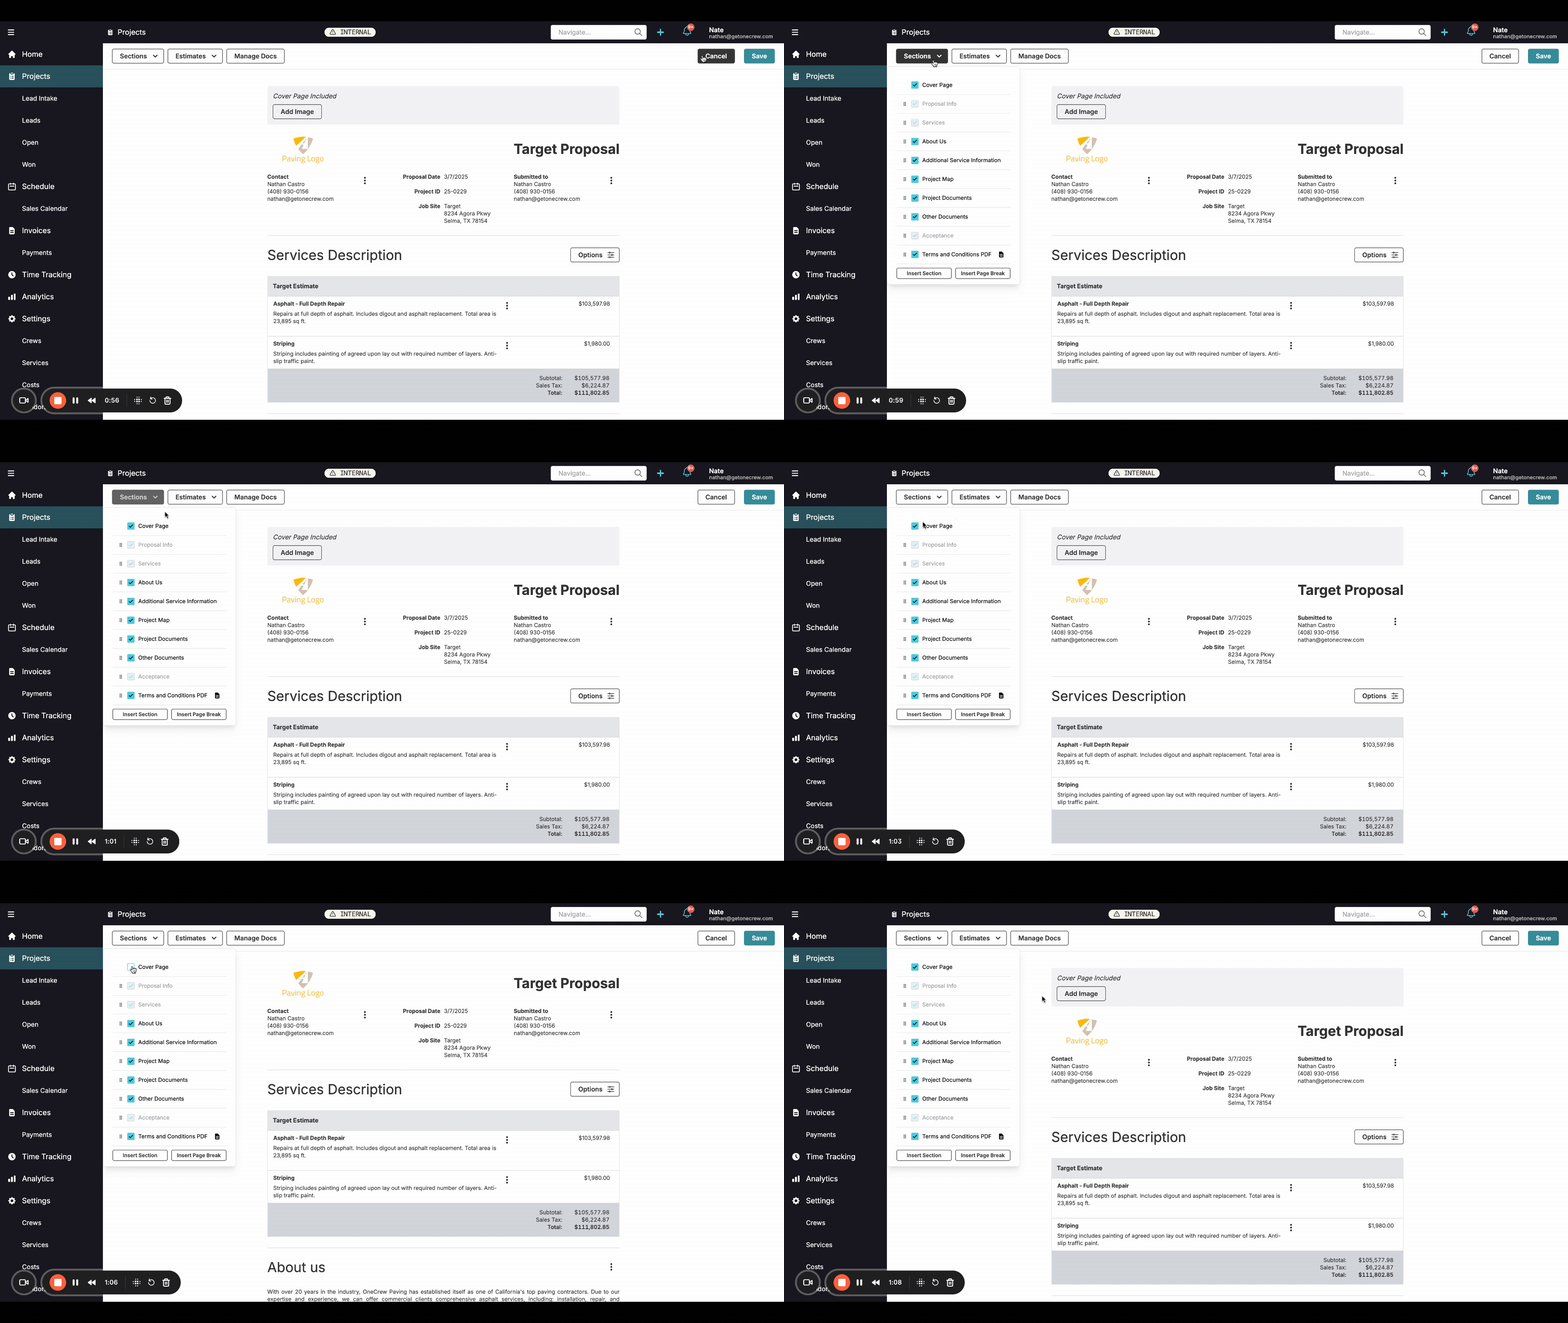
This tutorial will guide you through customizing the layout of your proposals. You'll learn how to add or remove a cover page, include a cover image, and reorder various sections to create a professional and tailored document for your clients. Structuring your proposal effectively can significantly enhance its clarity and impact, helping you present information in the most logical and compelling way.
Step-by-Step Instructions
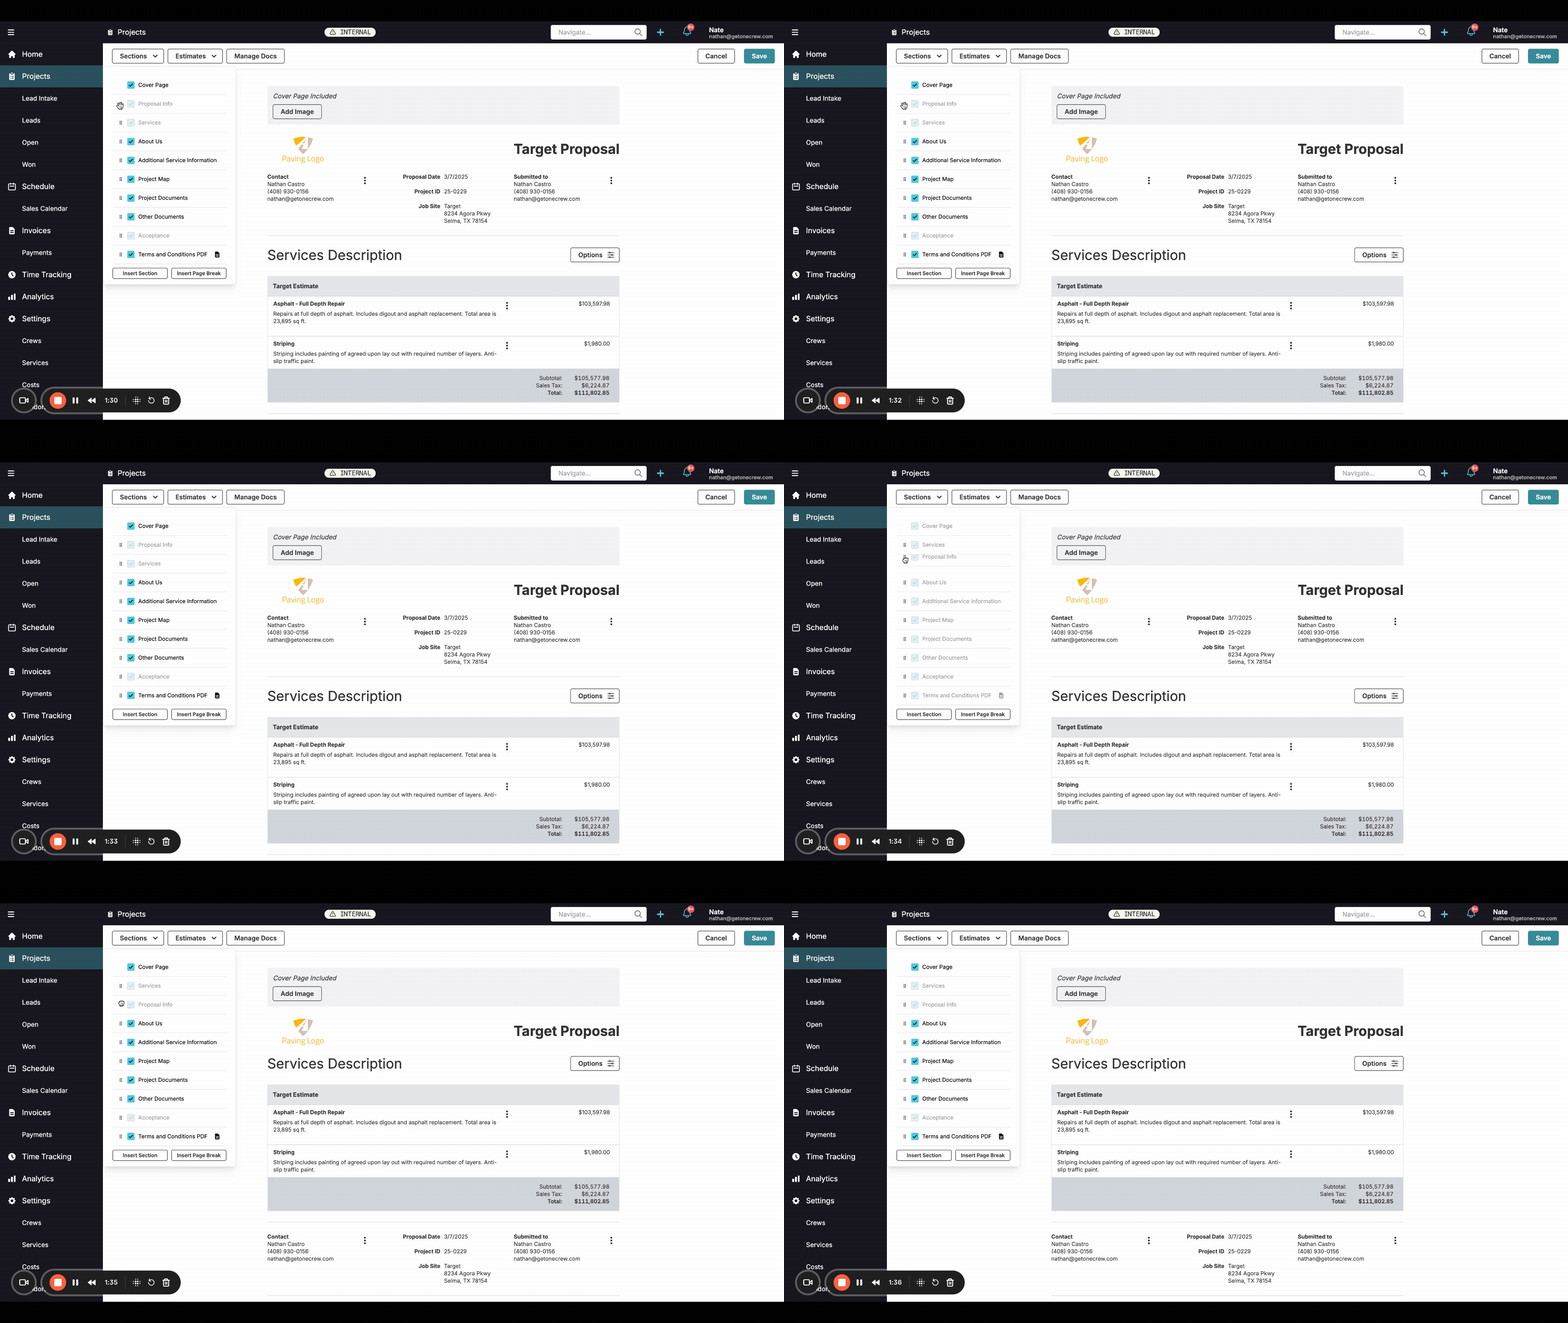
Follow these steps to customize the sections within a specific proposal:
Open Your Proposal for Editing:
Navigate to the project containing the proposal you wish to edit.
Open the proposal. You should see a preview of the document.
Click the Edit icon (it looks like a pencil), usually located in the top right corner of the proposal view. This will switch you to the editing mode.
Access the Sections Panel:
In editing mode, click the Sections button, typically found at the top left of the proposal editor interface. A dropdown panel will appear on the left, listing all available sections for your proposal, such as Cover Page, Proposal Info, Services, About Us, Project Map, etc.
Manage the Cover Page:
Include or Exclude: In the Sections panel, locate the Cover Page option at the top. Check the box to include a cover page for this proposal, or uncheck it to remove the cover page.
Add a Cover Image: If the Cover Page is enabled (checked), you'll see an Add Image button appear in the main proposal preview area, within the space designated for the cover page. Click this button to upload an image from your computer to be used as the cover page background or centerpiece.
Reorder Proposal Sections:
In the Sections panel, you'll see a list of all current and potential sections.
To change the order, click and hold on a section name (e.g., Services, About Us). Your cursor will change, and you can then drag the section up or down to your desired position in the list. The proposal preview on the right will update to reflect the new order of sections.
Insert Page Breaks or Custom Sections (Optional):
At the bottom of the Sections panel, you'll find buttons such as Insert Section and Insert Page Break.
Click Insert Page Break to add a new page break. This item will appear in the sections list, and you can drag it to the desired location to force content onto a new page.
Click Insert Section to add a new custom content block if you need to include information not covered by the standard sections.
Save Your Changes:
Once you are satisfied with the cover page and the order of sections, click the Save button, usually located in the top right corner of the editing interface, to apply your customizations to this specific proposal.
Insight: Global Proposal Settings You can set default behaviors for all new proposals, including whether a cover page is enabled by default and the standard order of sections. Access these by navigating to Settings from the main application menu, then selecting Proposals. Changes made in this area will apply to future proposals you create. For example, in Settings > Proposals, under Default Proposal Sections, you can define the default order and also set a Default Cover Page Photo that will be automatically used for new proposals that include a cover page.
Troubleshooting
Cover Page Not Showing:
Ensure the Cover Page checkbox is selected in the Sections panel for the specific proposal you are editing.
If you expect it to be on by default for all new proposals, verify your global settings under Settings > Proposals. The Enable Cover Page option should be checked, and subsequently, the Cover Page option under Default Proposal Sections should also be checked.
Section Order Not Changing in the Final PDF:
Make sure you are clicking and dragging the section names directly within the Sections panel while in editing mode.
Crucially, always click the Save button after making changes to an individual proposal. Global default changes in the Settings menu usually apply immediately or have their own save confirmation.
Cover Image Not Appearing:
After enabling the Cover Page in the Sections panel, ensure you have clicked the Add Image button (which appears on the proposal preview area for the cover page) and successfully uploaded your desired image.