Custom Project States
Last updated: August 7, 2025
Watch Video Demo Here
Overview
Custom Project States in OneCrew empower you to tailor your project workflows with precision, ensuring that the software aligns perfectly with your unique business processes. This feature allows you to define specific stages a project moves through, from inception to completion. The primary purpose is to provide a flexible and accurate way to track project progression, enhance team communication by standardizing project terminology, and generate more insightful analytics.
Benefits include:
Enhanced Workflow Customization: Adapt project stages to match your company's specific operational model.
Improved Clarity and Tracking: Gain a clearer view of where each project stands at any given time.
Accurate Analytics: Leverage custom states to drive more precise data for reporting and business intelligence.
Streamlined Operations: Ensure all team members are on the same page regarding project progression.
Configuration
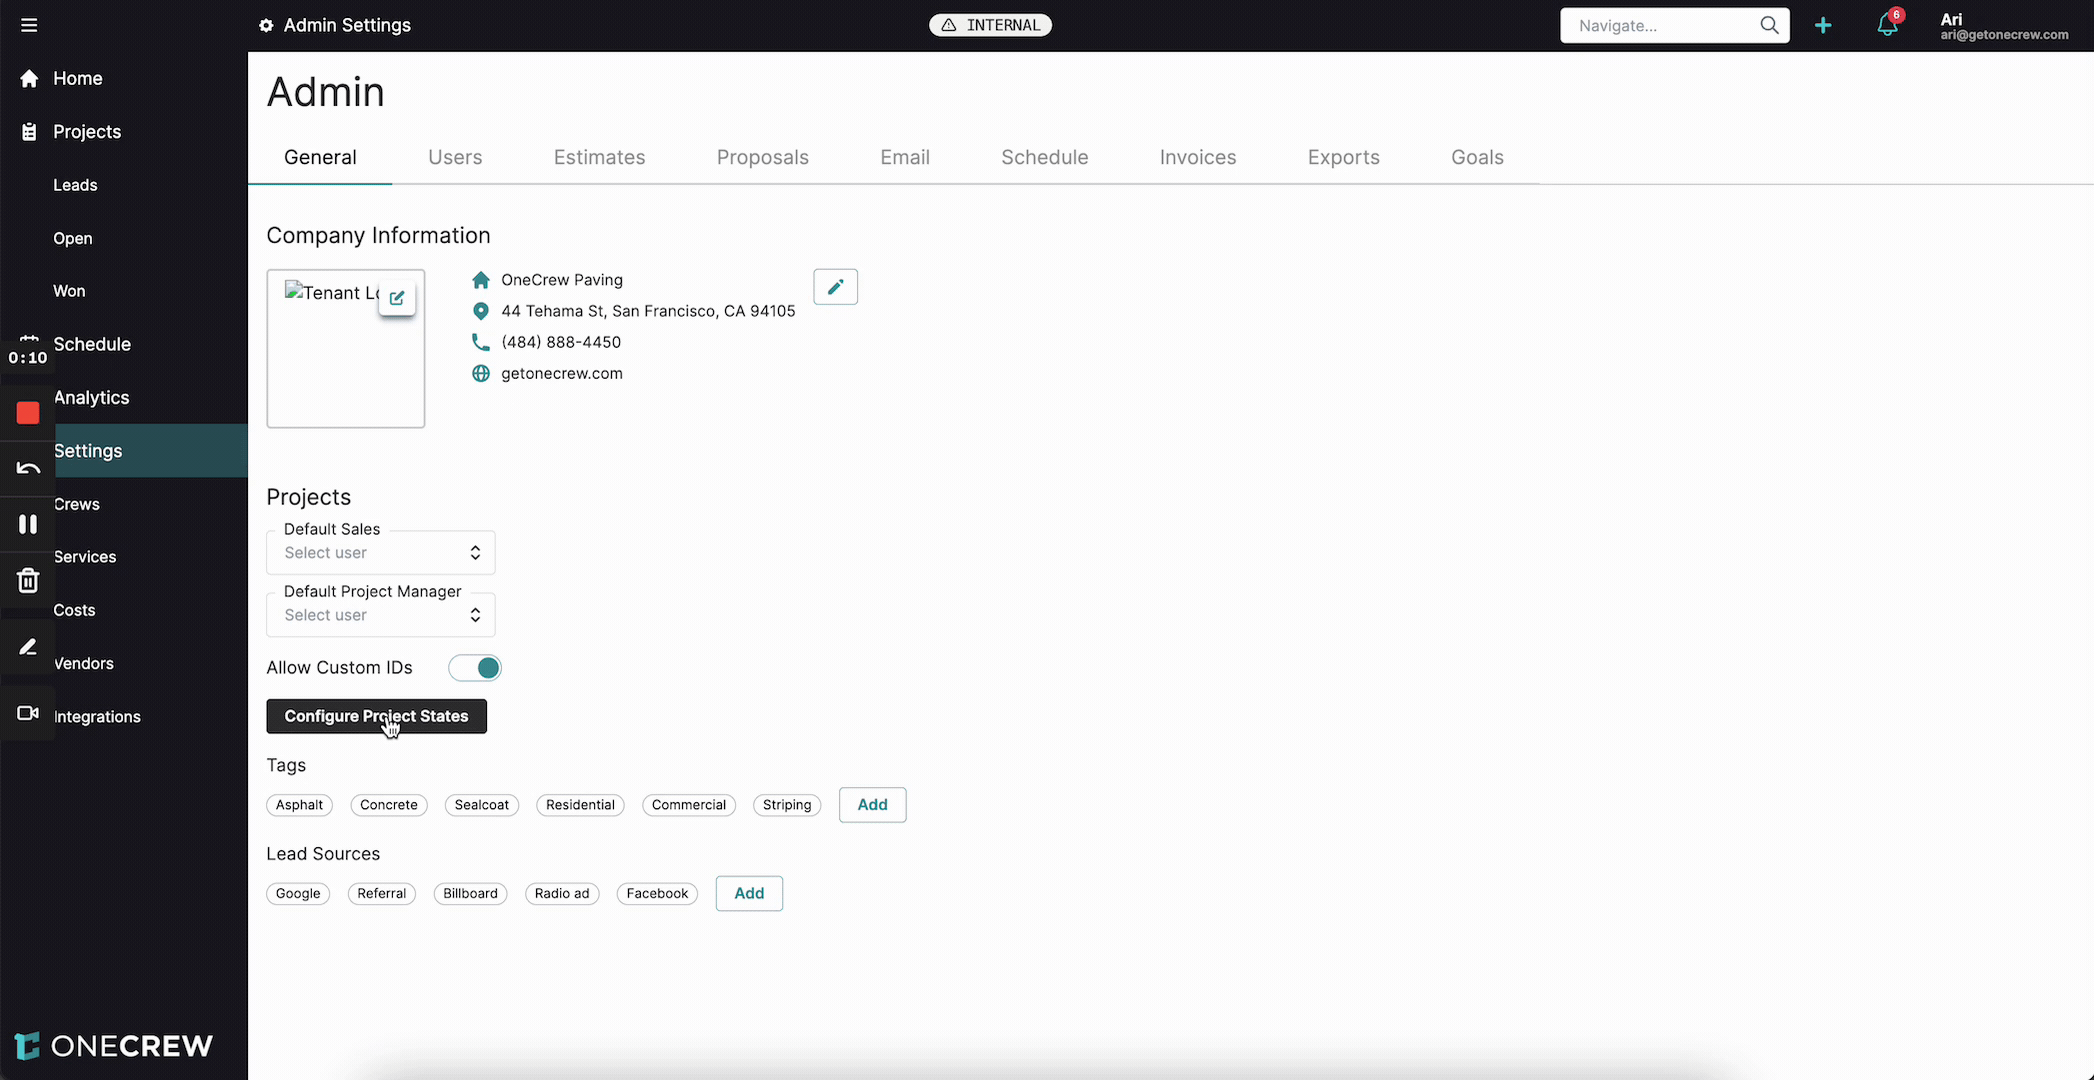
Setting up Custom Project States is straightforward. Administrators can access this feature through the admin settings.
Navigate to Settings from the main menu on the left.
On the Admin Settings page, ensure the General tab is selected.
Scroll down to the Projects section and click the Configure Project States button.
The Project States modal window will appear. This window displays the default project state "buckets" or categories, such as Lead, Estimating, Proposed, Sold, In Progress, Complete, Hold, and Dead. Each bucket can contain multiple individual states.
The default states within these buckets (e.g., "Estimating" and "Needs Approval" under the Estimating bucket) provide a foundational workflow.
To add a new custom state:
Identify the bucket under which your new state logically falls.
Click the
+(plus) icon to the right of the bucket name (e.g., next to Sold).In the Add Item dialog that appears, enter the desired Name for your new state (e.g., "Ready to be Scheduled").
Click the Add Item button. The new state will appear at the bottom of the list within that bucket.
To reorder states within a bucket:
Simply click and drag the state you wish to move to its new position within the same bucket. The order here dictates how they appear in dropdowns.
To delete a custom state:
Click the trash can icon next to the name of the custom state you wish to remove. Note that some default system states may not be deletable.
Once you've made your desired changes, click the Save button at the top right of the Project States modal. A confirmation message "Successfully saved project state configuration" will appear.
Pro Tip: Plan your project states thoughtfully before configuring them. Consider your entire project lifecycle and where additional detail or clarity is needed. This minimizes the need for frequent re-adjustments.
Use Cases
Understanding when and why to use Custom Project States can significantly enhance your project management efficiency.
You should consider configuring custom states when:
Your company's project lifecycle involves more steps than the default states provide. For example, you might have multiple review stages within the "Proposed" phase.
You need to track specific milestones that aren't covered by standard states, such as "Awaiting Client Feedback" or "Materials Ordered."
Different types of projects in your organization follow distinct workflows.
You want to improve the granularity of your project reporting and analytics. For instance, distinguishing between "Initial Contact" and "Qualified Lead" within the "Lead" phase.
Reasons to implement custom states:
Reflect Operational Nuances: If your paving company has a distinct "Site Survey" step after a lead is accepted but before an estimate is created, a custom state makes this visible.
Standardize Team Terminology: Ensure everyone uses consistent terms for project stages, reducing confusion.
Enhance Sales and Operations Handoffs: Clearly mark when a project is "Ready for Scheduling" after being sold, signaling a handoff from sales to operations.
Examples
Let's illustrate how custom project states can be applied in real-world scenarios.
Scenario 1: Adding a Pre-Scheduling Step
A paving company wants to explicitly track when a sold project is fully prepared for scheduling but not yet on the calendar.
In Configure Project States, under the Sold bucket, they click
+.They name the new state "Ready to be Scheduled" and click Add Item.
They drag "Ready to be Scheduled" to sit between their existing "Accepted" and "Scheduled" states.
After saving, when viewing a project, this new state will be an option in the status dropdown. If a project's status is changed to "Ready to be Scheduled" (or any other state within the "Sold" bucket that signifies acceptance), and it wasn't previously marked as sold, the system may prompt for Proposal Acceptance to confirm which estimate items were won.
Scenario 2: Qualifying Leads
The sales team wants to differentiate new leads from those that have been vetted and are ready for assignment to a salesperson.
In Configure Project States, under the Lead bucket, they click
+.They name the new state "Ready to be Assigned" and click Add Item.
They might place this after a general "Lead" state.
This allows them to see at a glance which leads require initial assignment.
Impact on Analytics and Project Dates
Custom Project States directly influence project analytics by refining the dates associated with key project milestones.
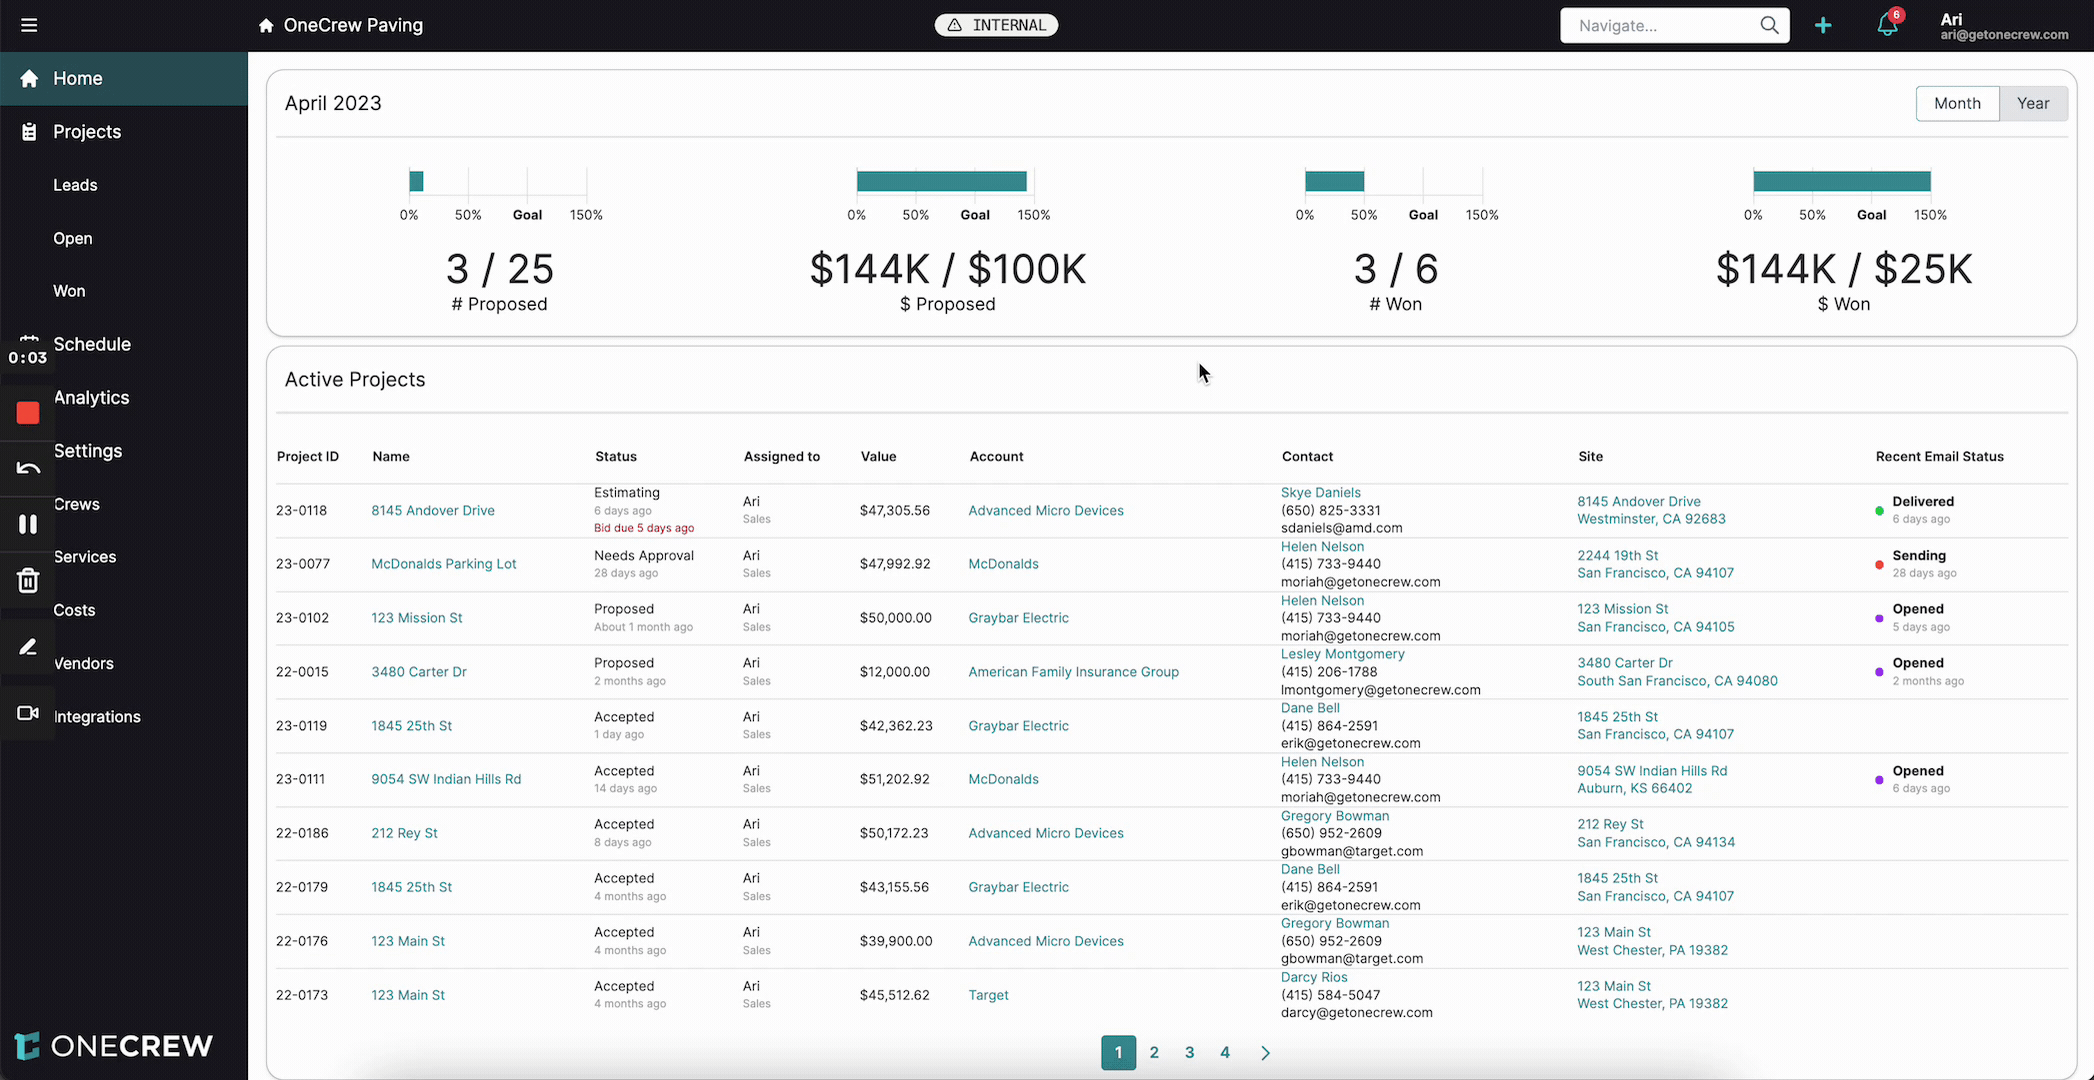
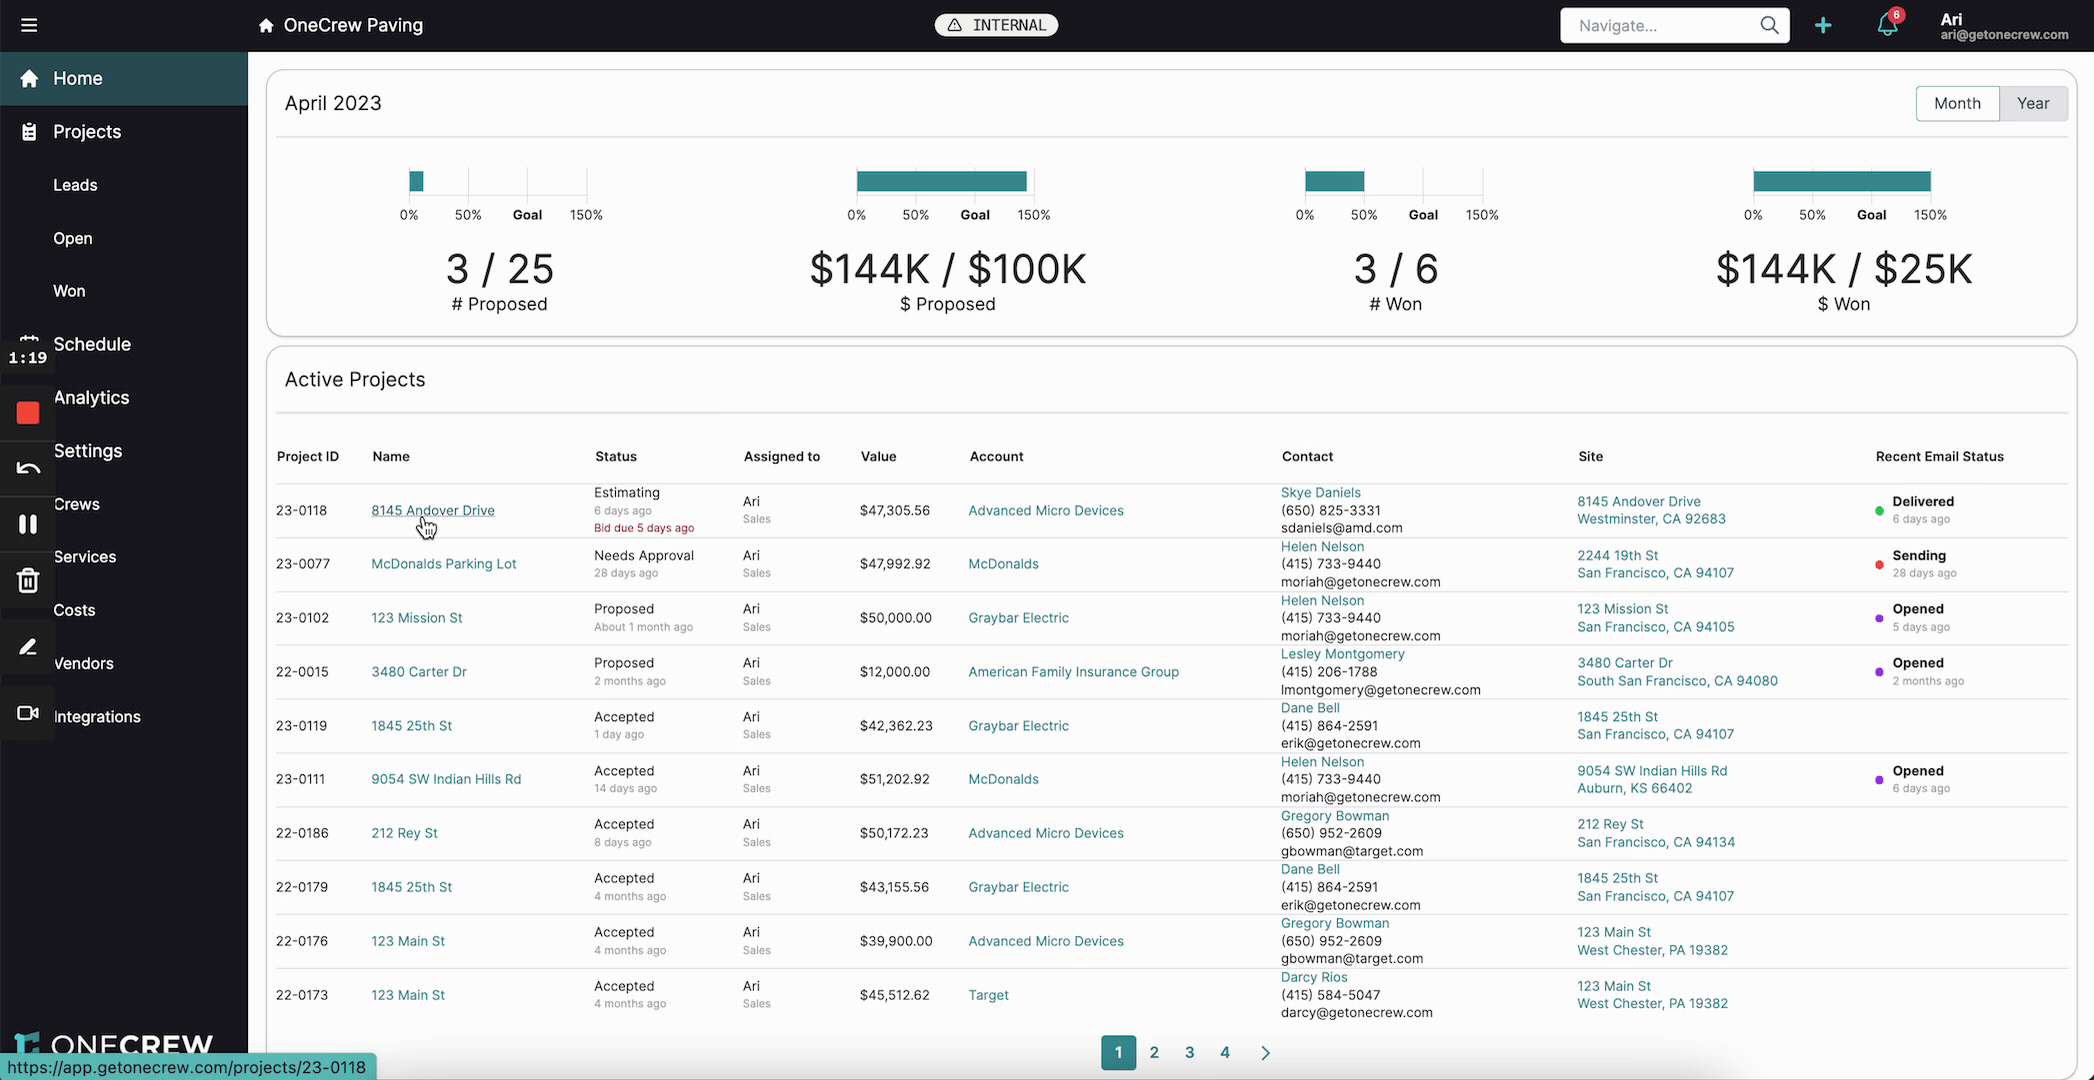
When you navigate to a specific project and click its name or the edit icon, and then click Modify Project Dates (this button may appear after clicking to edit the project details), you'll see fields like Lead Date, Estimated Date, Proposed Date, and Sold Date.
These dates are automatically populated when a project first enters any state within the corresponding primary bucket (Lead, Estimating, Proposed, Sold). For instance, if "Ready to be Assigned" is in the "Lead" bucket, moving a project to this state will set or update the Lead Date.
If a project skips a primary stage (e.g., goes from Estimating directly to a state in the Sold bucket), the Proposed Date will automatically be set to the same date as the Sold Date.
You can manually adjust these dates via the Modify Project Dates section. This is useful for correcting historical data if a state change was logged late.
Important: These dates must be chronologically logical. For example, an Estimated Date cannot be later than a Proposed Date.
Analytics reports (e.g., number of projects proposed per month) will use these specific dates. So, if you modify a Proposed Date from May to April, the project will count towards April's proposed figures.
These examples demonstrate the power of custom states to create a workflow that provides better operational control and more accurate business insights. For more information on how these dates affect reporting, see [add link to relevant analytics article].